What is Chatbot+?
This is a function that can add parts to run an action according to customer's needs.
[Action] represents functions like message, display stamp, move from page, add tag etc.
Definition of each word
Parts
It is a unit of Chatbot+ automatic processing.
It includes rules and actions.
Rule
It is a condition to activate the chatbot.
Action
It is an action that hthe catbot does when the rule is matched.
Add parts
(1) Click on the setting button on the upper right of the management page.
(2) Click on [Chat]>[Function]>[Chatbot+ βversion] on the left side of the screen.
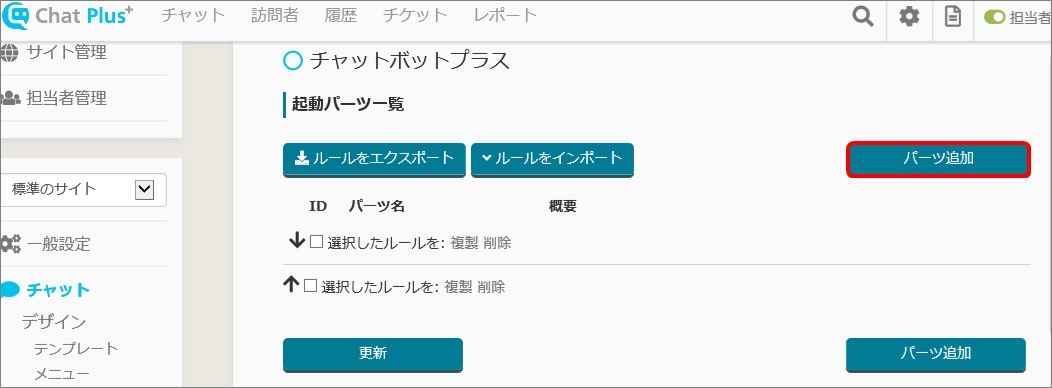
(3) Click on [Add parts].
(4) Enter [Part's name] and [Detail] of the service you want to add.
Setting rule
Set rules to activate parts
Rule is the condition to activate part's action added.
Choose rule from the pull down of each content.
Online/Offline
Online:When the chat is online, the part's action is activated.
Offline:When the chat is offline, the part's action is activated.
Either:The part's action will be activated regardless of the chat being online or offline.
Timer
No limit:It will always be activated when online/offline set above.
After displaying a page:It will be activated 〇 seconds after the customer displayed the page.
After displaying a site:It will be activated 〇 seconds after the customer displayed the site.
After customer's first remark:It will be activated 〇 seconds after customer's first remark.
Since customer's last remark:It will be activated 〇 seconds since customer's last remark.
Since operator's last remark:It will be activated 〇 seconds since operator's last remark.
Since chatbot's last remark:It will be activated 〇 seconds after regardless of who, but last remark.
After activating specific rule:It will be activated 〇 seconds after activating a specific rule.
when leaving a page:It will be activated when the customer is leaving a page.
Activation limit
You can set the limit to activate part's action.
For example, if you set the activation limit of message to [1], when the customer closes the message box once, it would not show the message box for certain amount of time even if the other rules are fulfilled.
Add rules
You can add activation rules in addition to [Setting rule] written above. (1) Click on [Add rules].
(2) Click on and choose a rule from the pull down.
Action setting
Set the action when it matched with a rule.
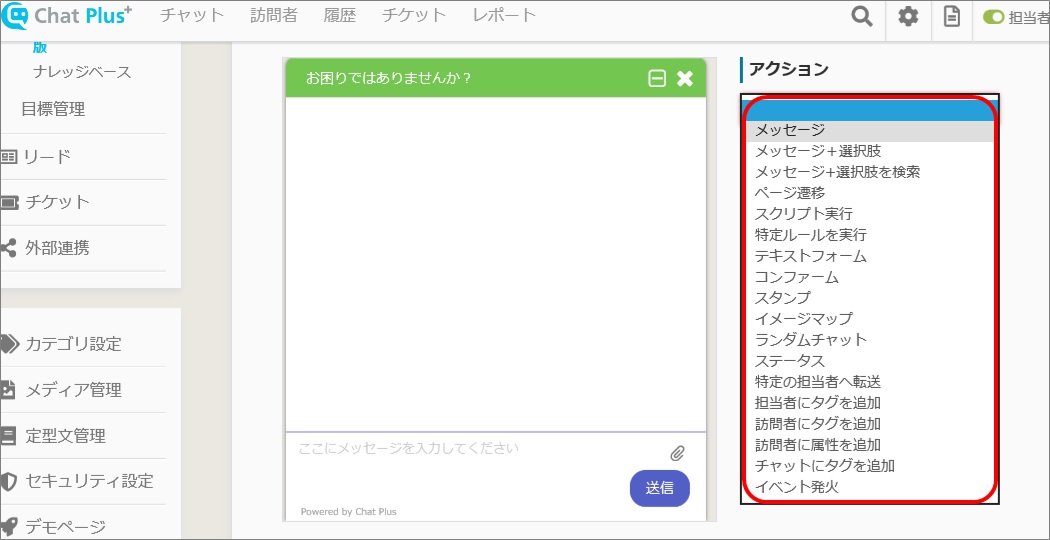
(1) Choose action from the pull down.
(2) Click on [Add actions], you can add multiple actions.
Actions and its content are shown below.
Message + Choices:It will display specific message and button (display status, transition to external link, forward to specific operator).
Search Message + choices:Display button to display message and registered choices.
Transit page:Transit to specified page.
Run script:Run a specific script (simple program).
Run specified rule:Make a reservation of chatbot which will be activated next.
Textform:You can display a form (Text, select, radio button etc).
Confirm:You can display [Yes] or [No] buttons.
Stamp:You can display specified image.
Image Map:You can add ImageMap.
Random chat:You can set chat responses randomly. You can set freely the rate of appearance to each message. It will be useful as fortunes and distribution of coupons.
Status:You can change chat's status to [Inactive] or [Offline] etc.
Forward to specific operator:You can forward the chat to specific operator (individual or all operators with a specific tag).
Add tag to operators:You can add tags to operators.
Add tag to visitors:You can add tags to visitors.
Add attribute to visitors:You can add attribute to visitors (company name, phone number, site name etc..)
Add tags to chat:You can add tags to chat.
Fire event:You can send event to external application.
Text form
You can create [Text form] in Chatbot+.
In this page, it explains about the setting of actions.
The list of actions in text form
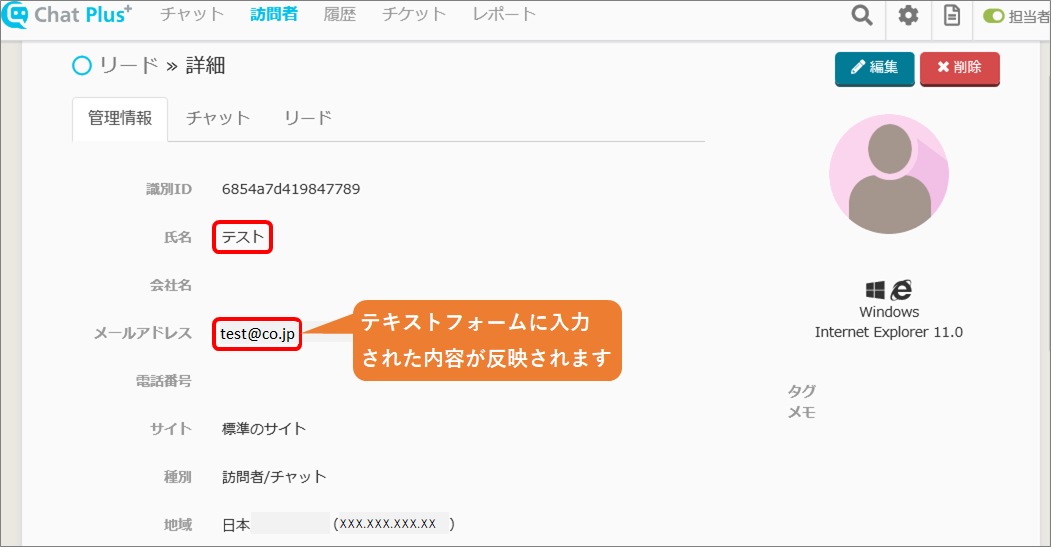
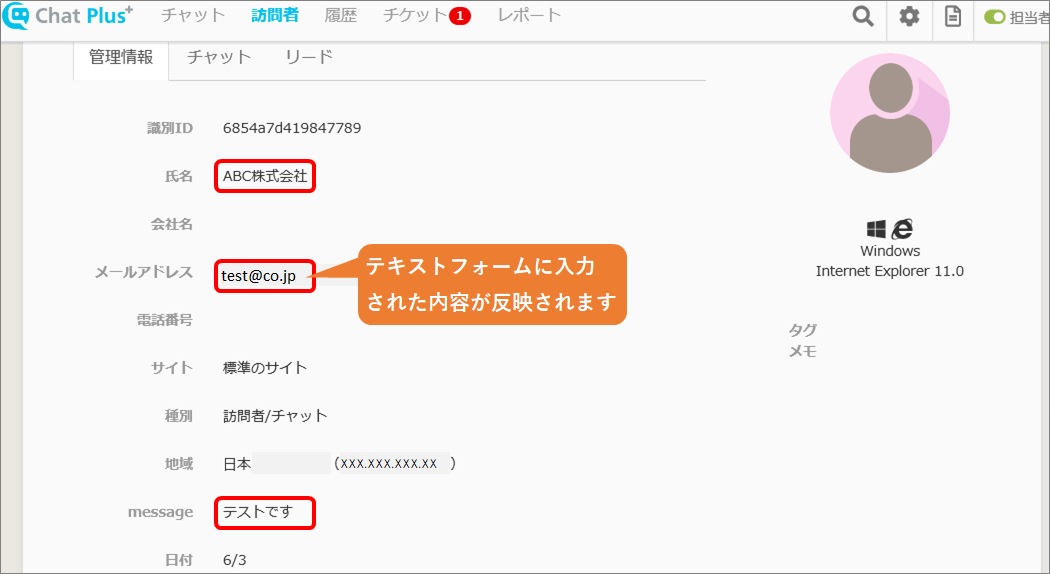
Attribute:The content entered in the form is reflected in attribute information of visitors.
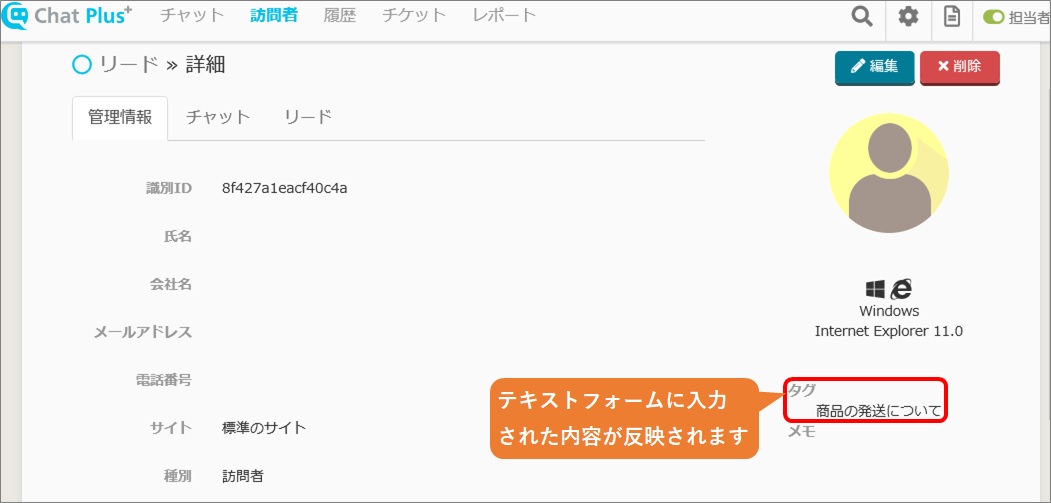
Tag:The content entered in the form is reflected in tag information.
Remark:The content entered in the form is reflected in chat history.。
Postback:The content entered in the form is posted to the specific URL.
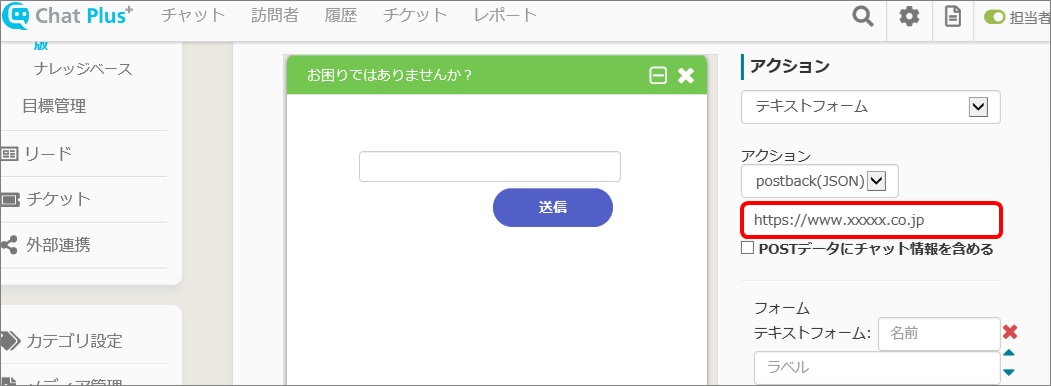
Postback(JSON):The content entered in the form is posted to specific URL in JSON form.
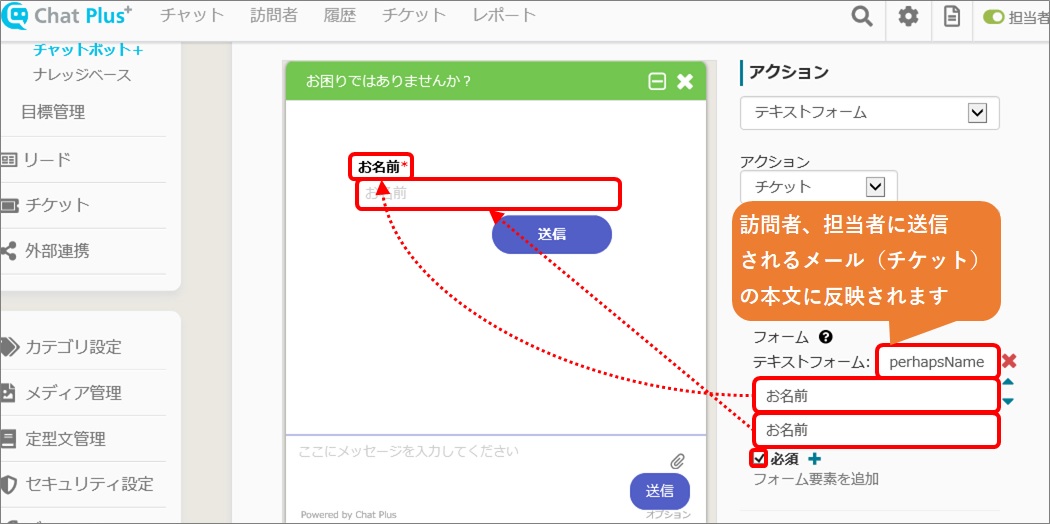
Ticket:The ticket will be created with the content entered in the form.
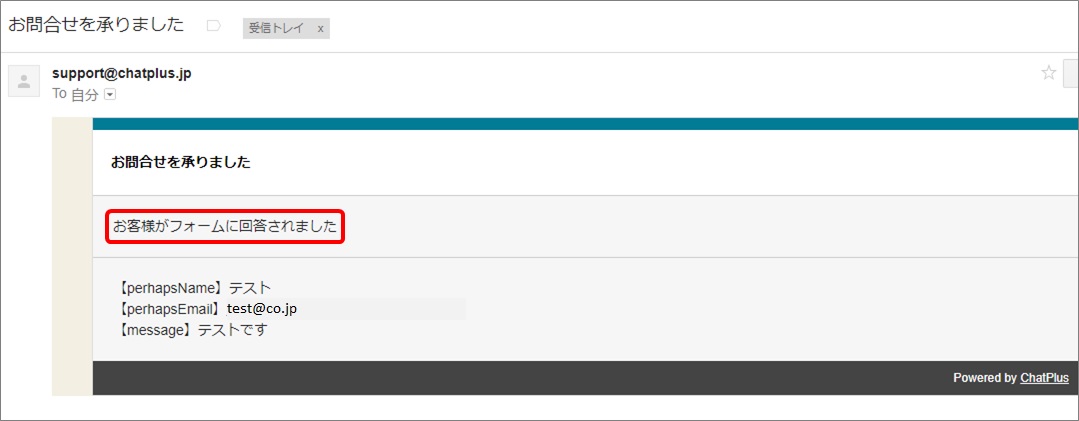
Email:The content entered in the form is sent to a designated email address.
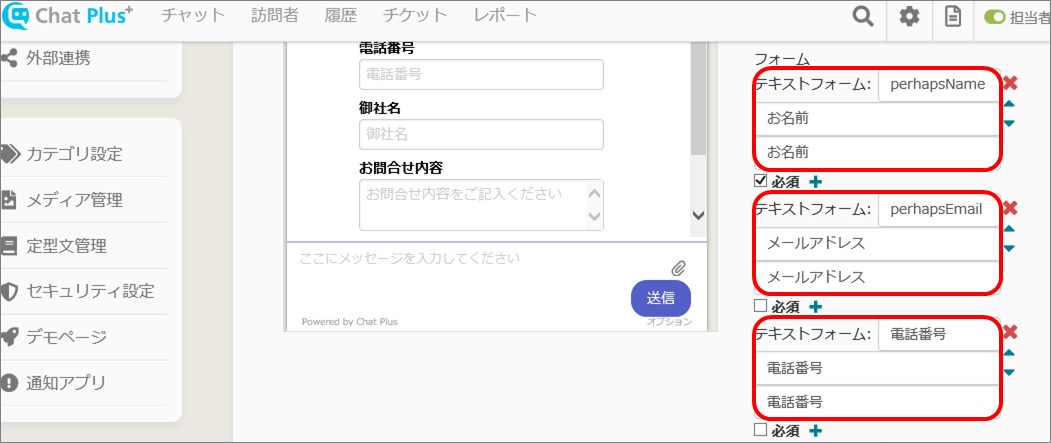
Attribute
In here, it explains how to set [Attribute] of action.
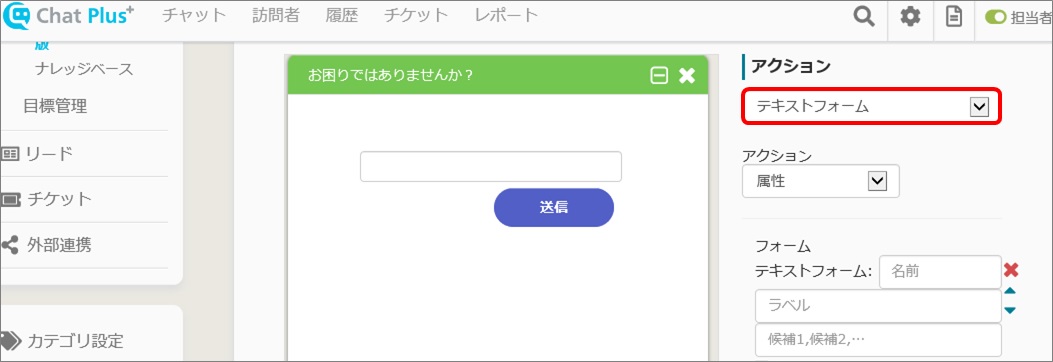
(1) Click on [Text form] from the pull down.
(2) Click on [Attribute] from the action pull down.
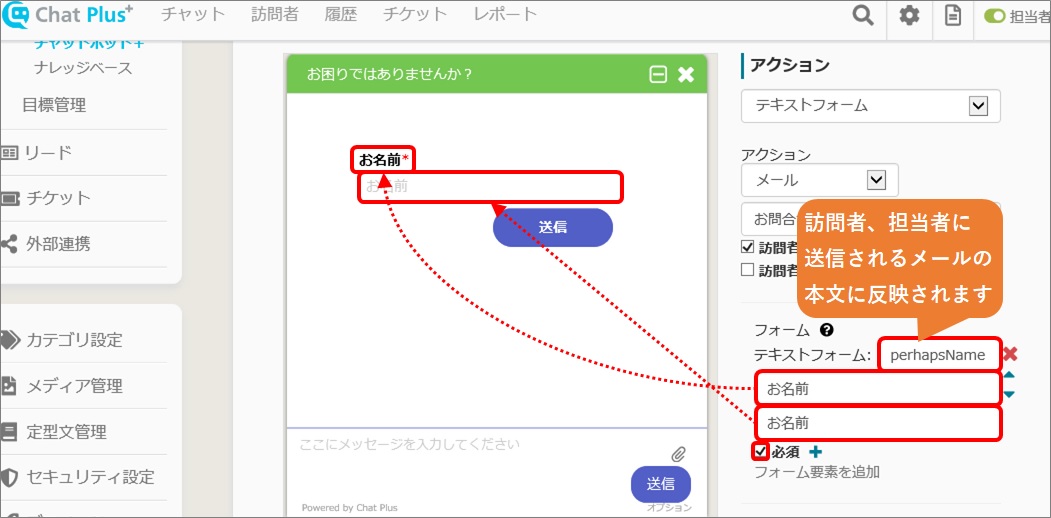
(3) Click on [Add a form element].
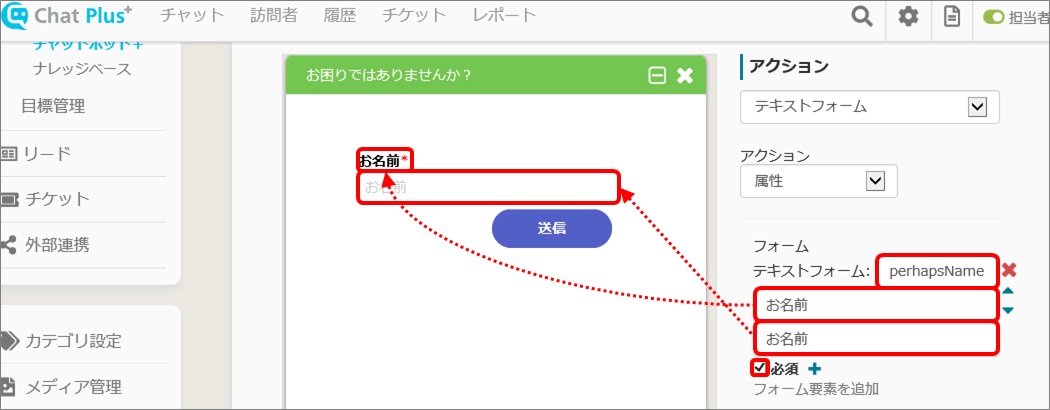
(4) Click on [Text form] and enter in the box.
※Check in the box [Require] if you want the content to be required to fill.
(5) Add form of necessary contents and enter in boxes.
(6) Click on [Update].
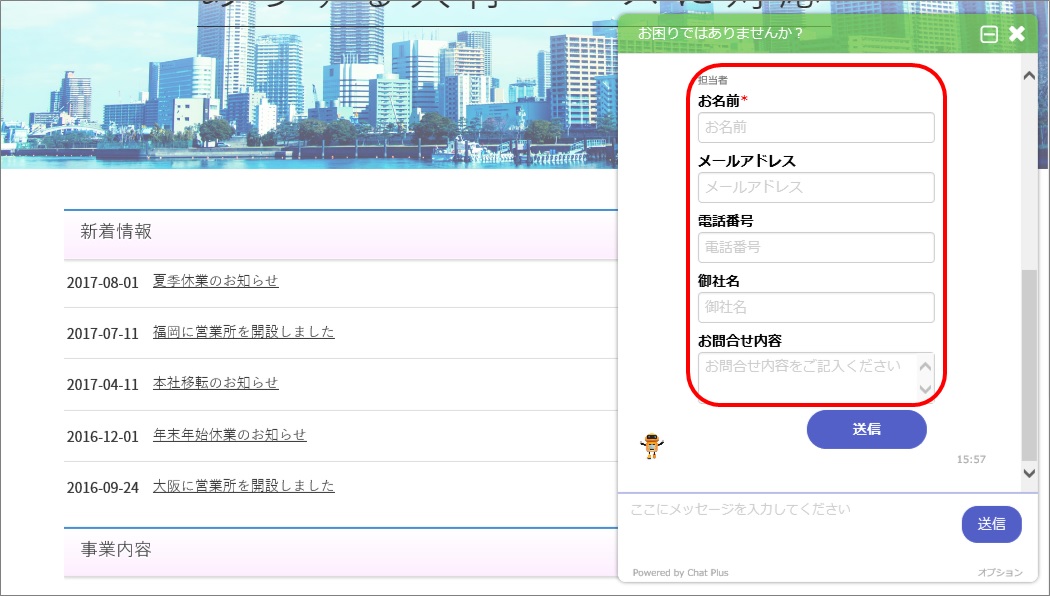
Text form displayed to site
Updated visitor's screen
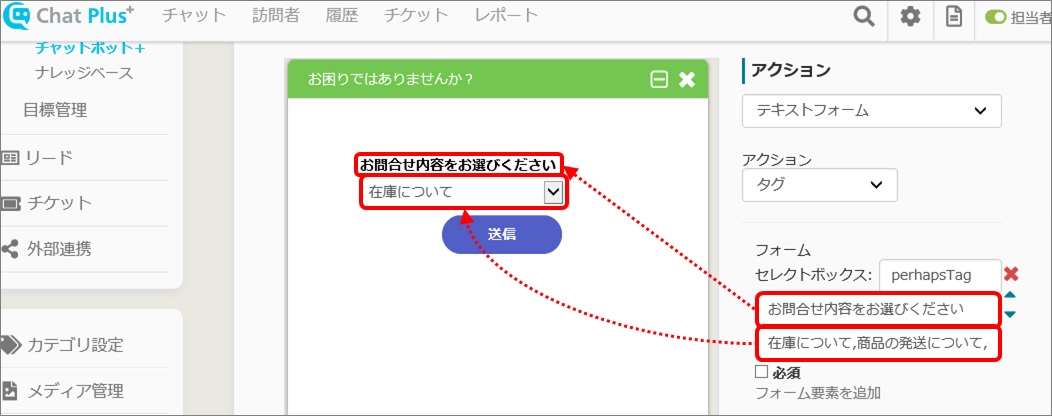
Tag
(1) Choose [Text form] from the action pull down.
(2) Choose [Tag] from the action pull down.
(3) Click on [Add form element].
(4) Click on [Select box] and enter in the box.
※Check in the box [Require] if you want to make the content required to fill.
(5) Click on [Update].
Text form that displayed to site
Updated visitor screen
Postback(JSON)
In here, it explains how to set action [Postback (JSON)].
(1) Click on [Text form] from the pull down.
(2) Choose [Postback (JSON)] from the pull down.
(3) Enter URL which you want to send the JSON form data to in the box.

(4) Click on [Update].
Ticket
In here, it explains how to set action [Ticket].
(1) Choose [Text form] from the pull down.
(2) Click on [Ticket] from the pull down.
(3) Enter ticket's subject and check in necessary contents.
※Check in the box [Do not send confirmation email to visitor] if you do not wish to send emails to customers.


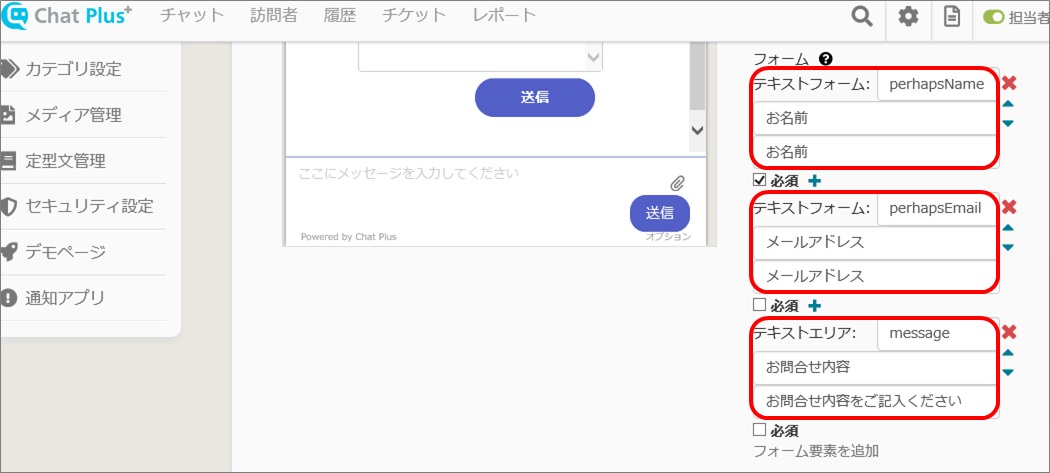
(4) Click on [Add form content].
(5) Click on [Text form] and enter in the box.
※Check in the box [Do not send confirmation email to visitor] if you do not wish to send emails to customers.
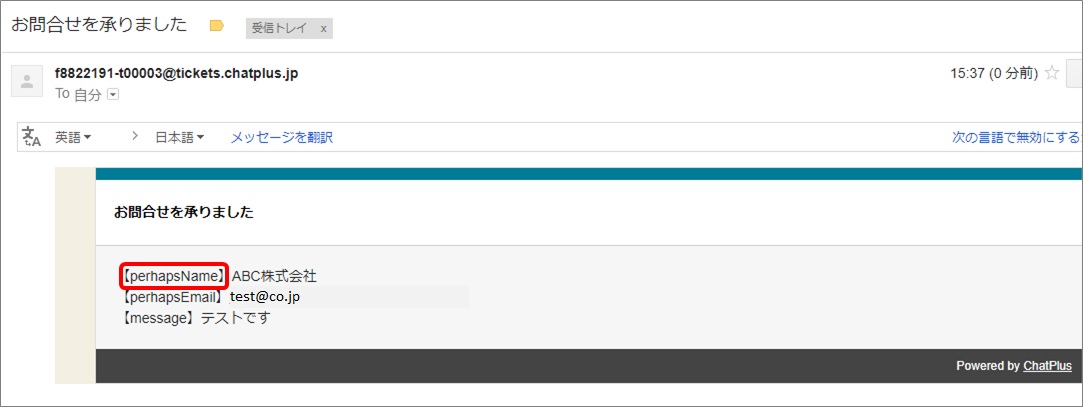
(6) Add necessary forms of contents and enter in boxes.
(7) Click on [Update].
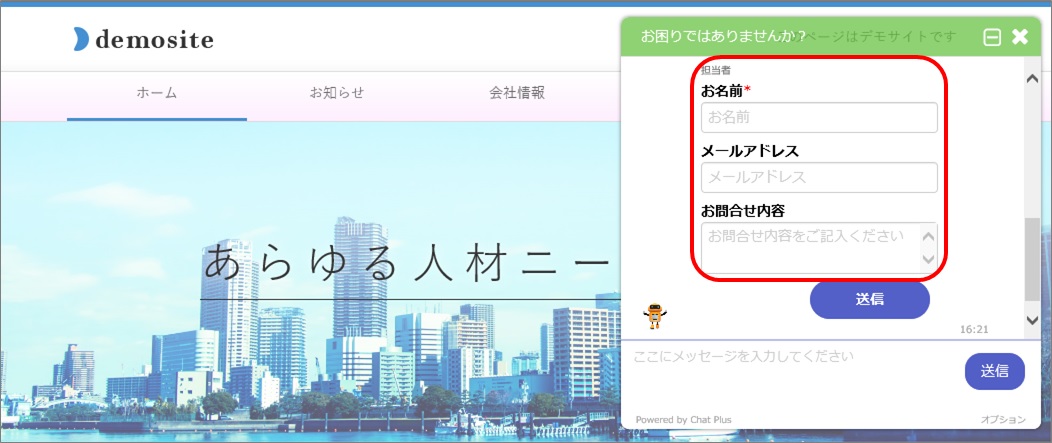
Text form displayed to site
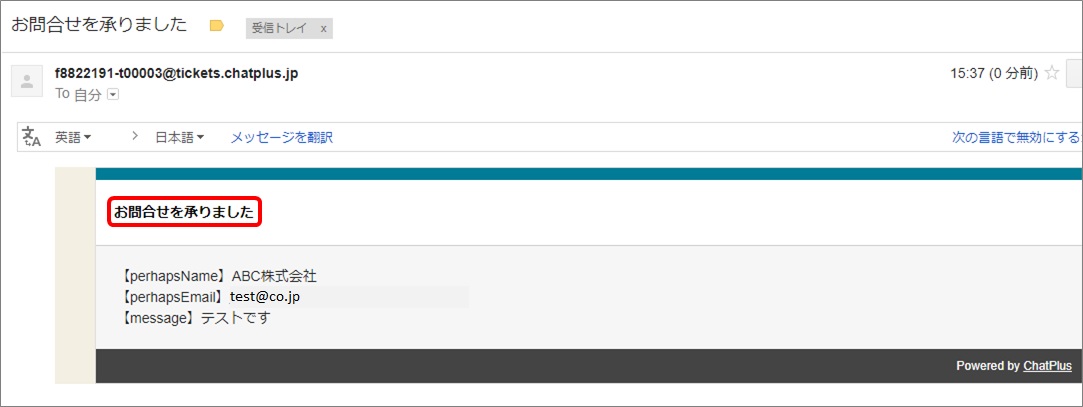
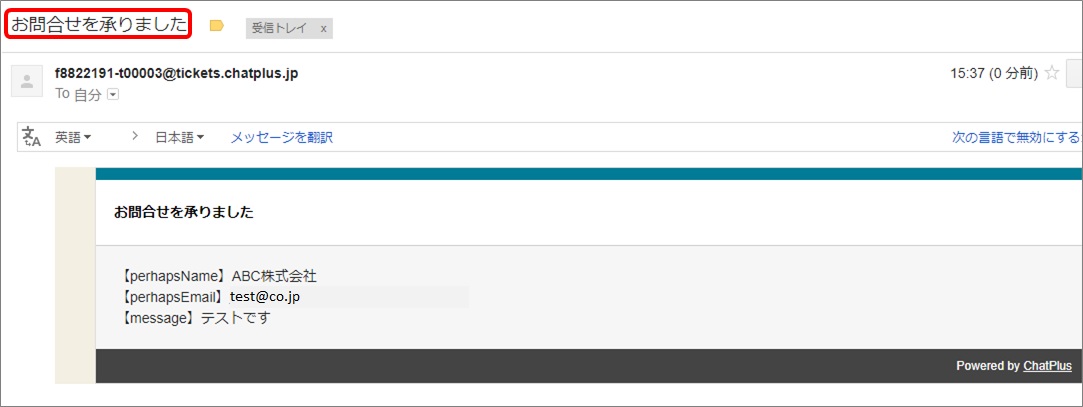
Email sent out to customers
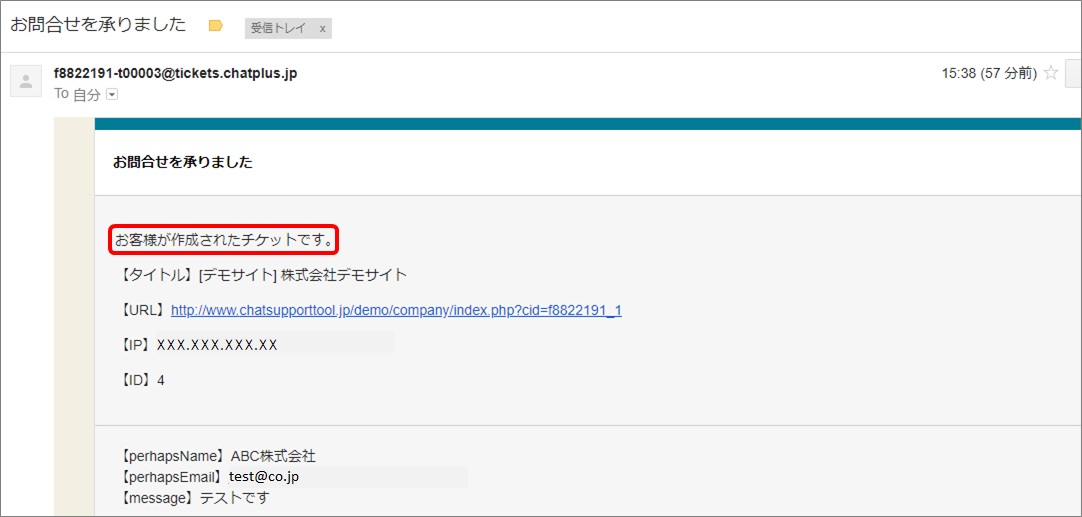
Email sent out to operators
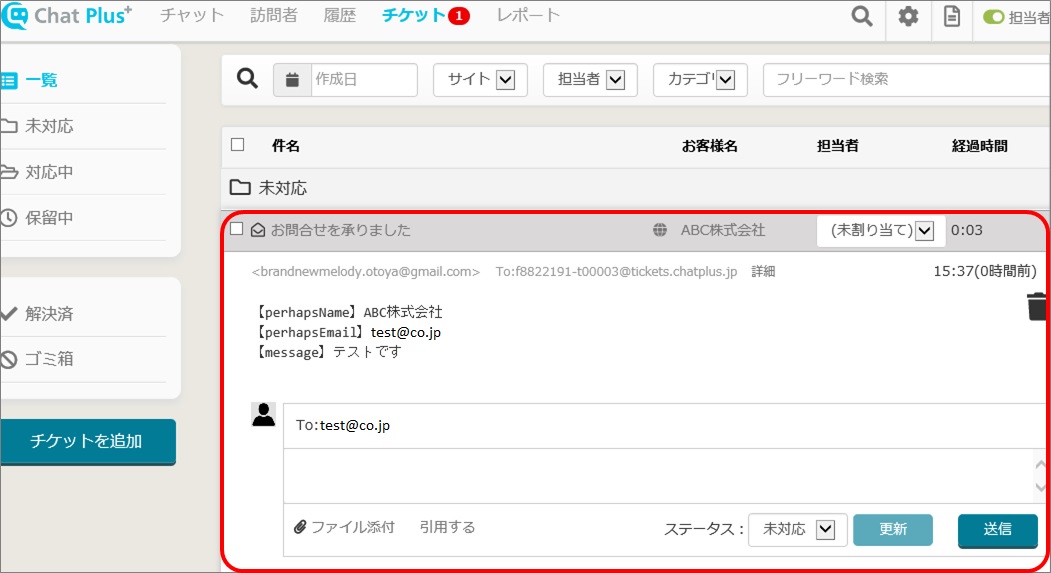
Ticket created
Here, it explains how to set action [Email].
(1) Choose [Text form] from the pull down.
(2) Choose [Email] from the pull down.
(3) Enter email's subject in the box and check in necessary places.
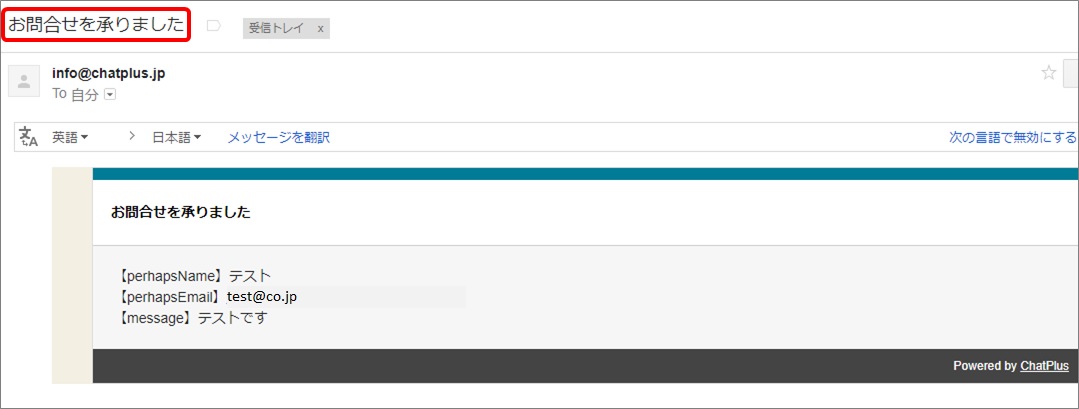
※Check in the box [Do not send confirmation email to visitors] if you do not wish to send emails to customers.

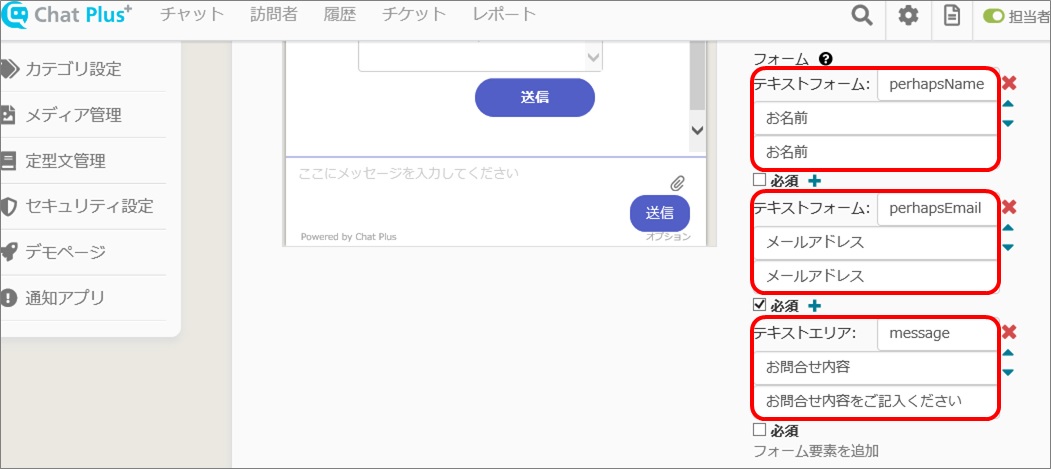
(4) Click on [Add form element].
(5) Click on [Text form] and enter in boxes.
※Check in the box [Do not send confirmation email to visitors] if you do not wish to send emails to customers.
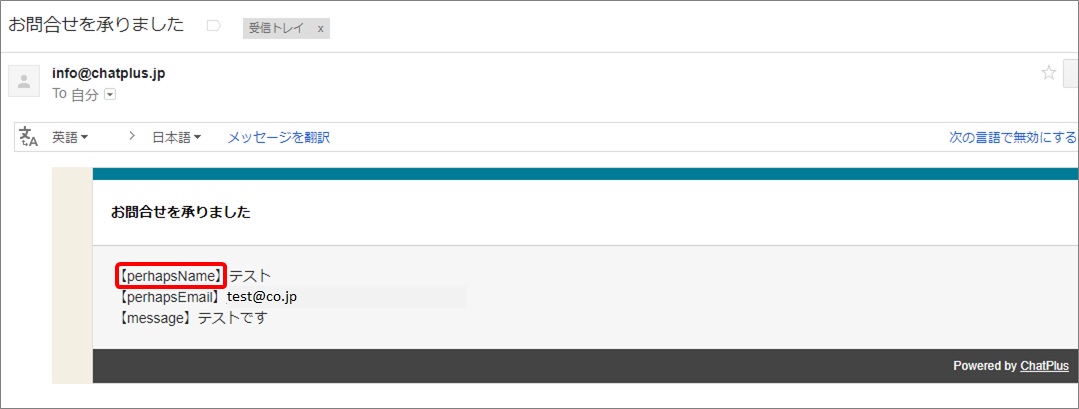
(6) Add forms of necessary contents and enter in boxes.
(7) Click on [Update].
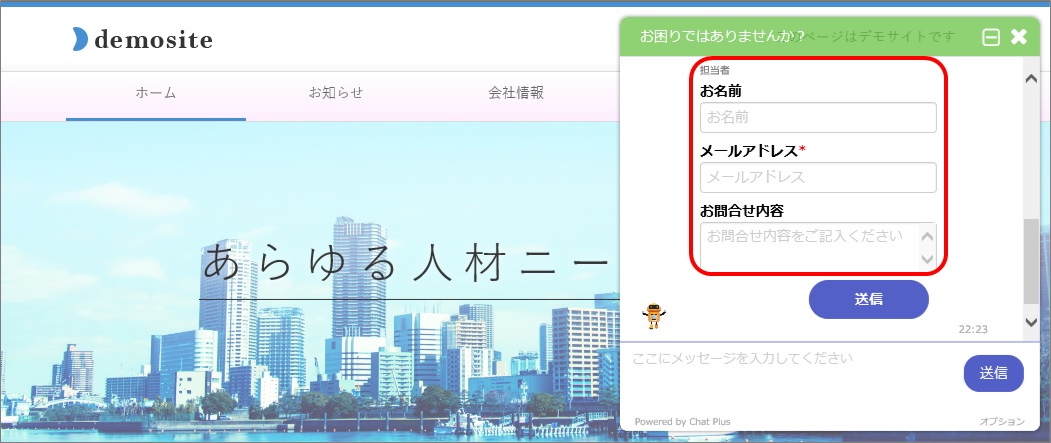
Text form displayed to site
Email sent out to customers
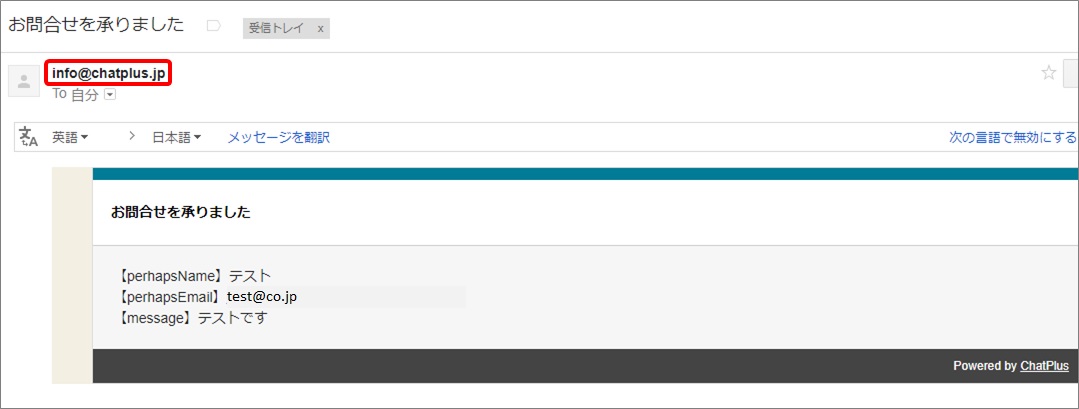
Email sent out to operators
List of forms that can be added
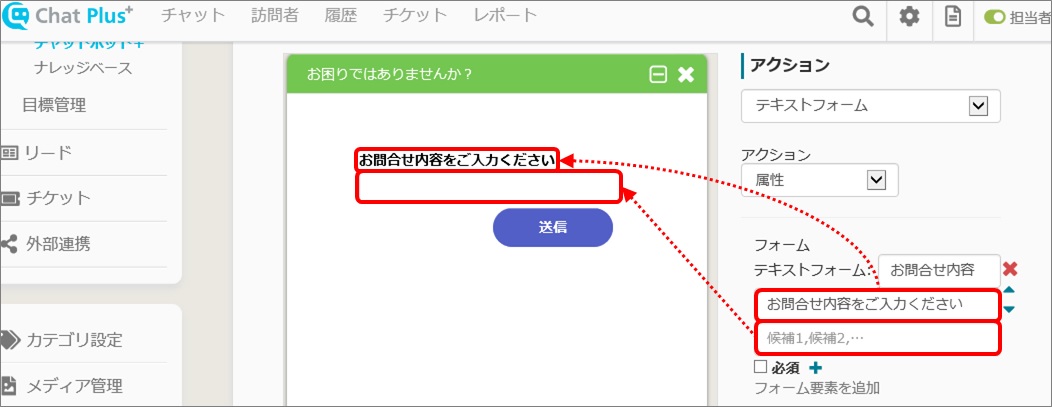
■Text form
You can display text form.
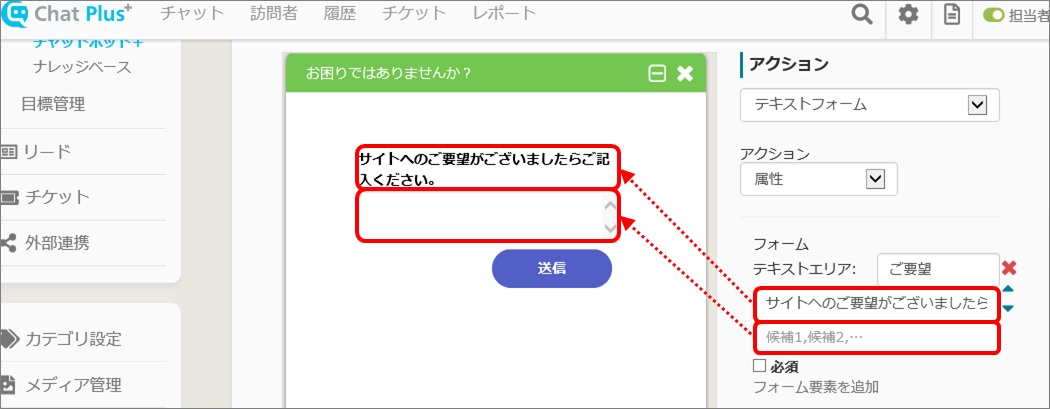
■Text area
You can display the text area.
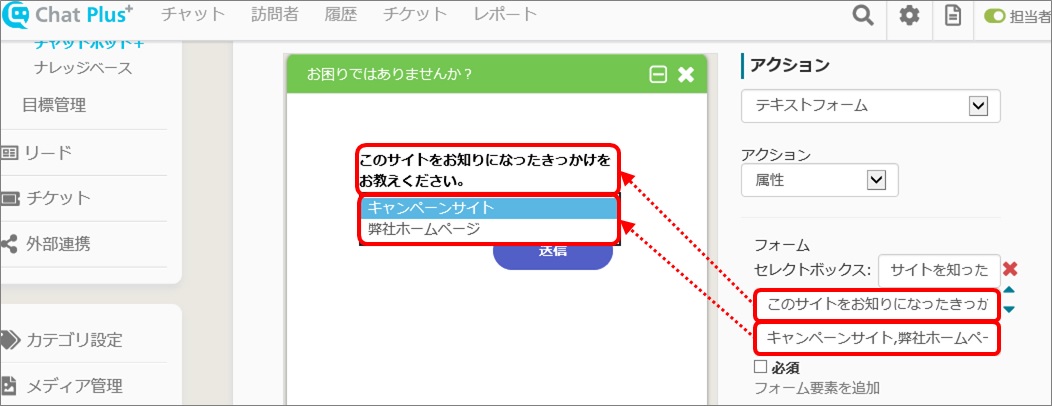
■Select box
You can display select box.
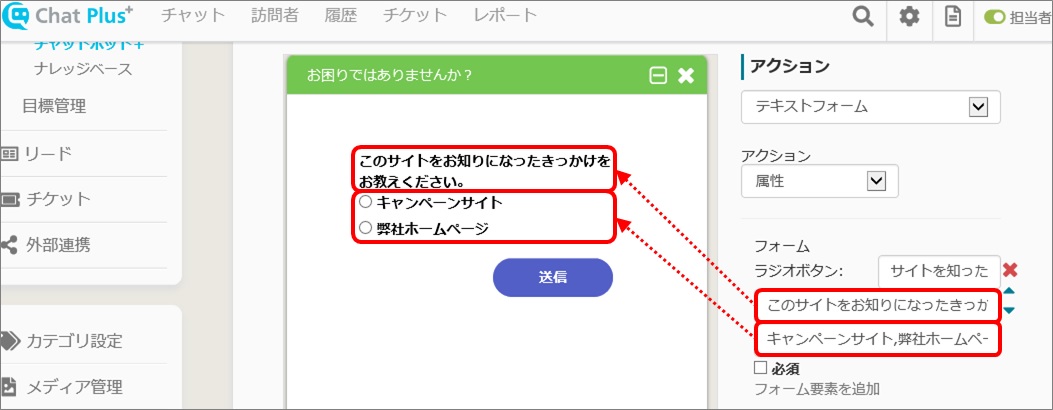
■Radio button
You can display radio button.
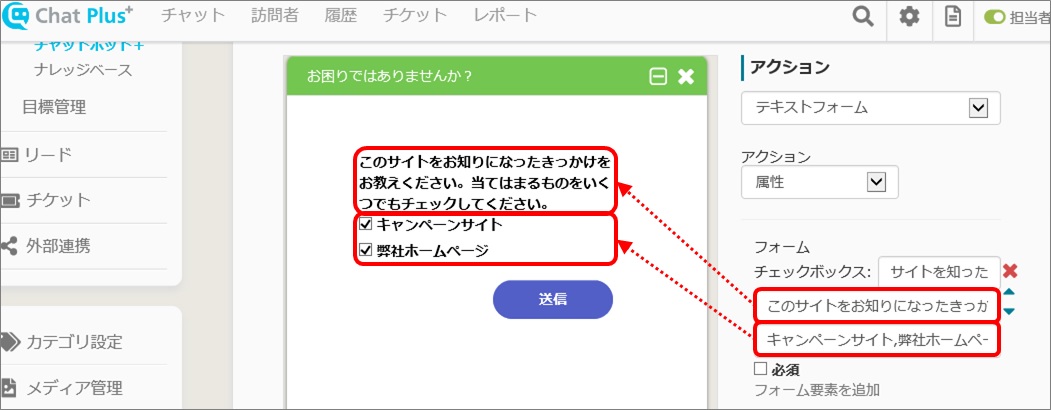
■Check box
You can display check box.
■Text
You can display text.
■File
You can display form to send file.


