

In Chat Plus, you can route the chat from users to the appropriate operators. Here is how you do it.
Prepare Routing
Put tags on operators
(1) Click on the setting button on the upper right of the management page. 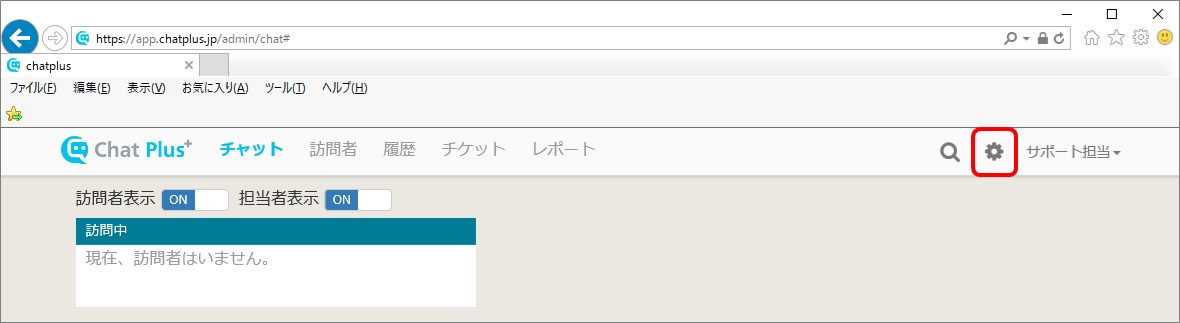
(2) Click on [Manage Operators] on the left side of the screen. 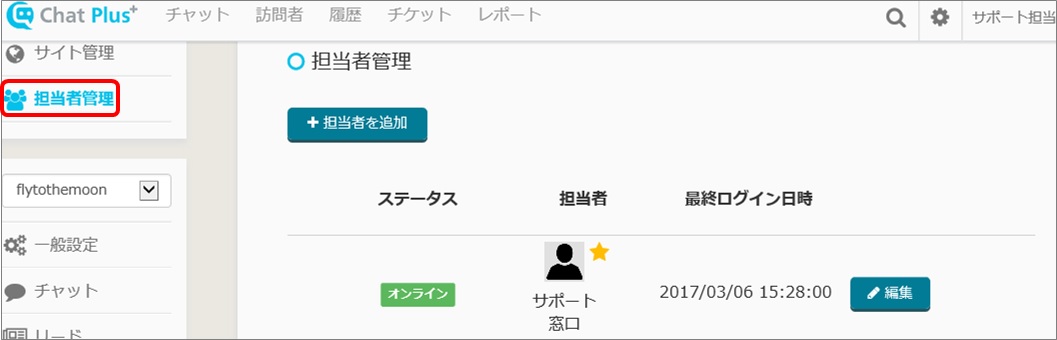
(3) [Manage Operator]'s window will show, click on [Edit] of the operator you want to change chat reception hours. 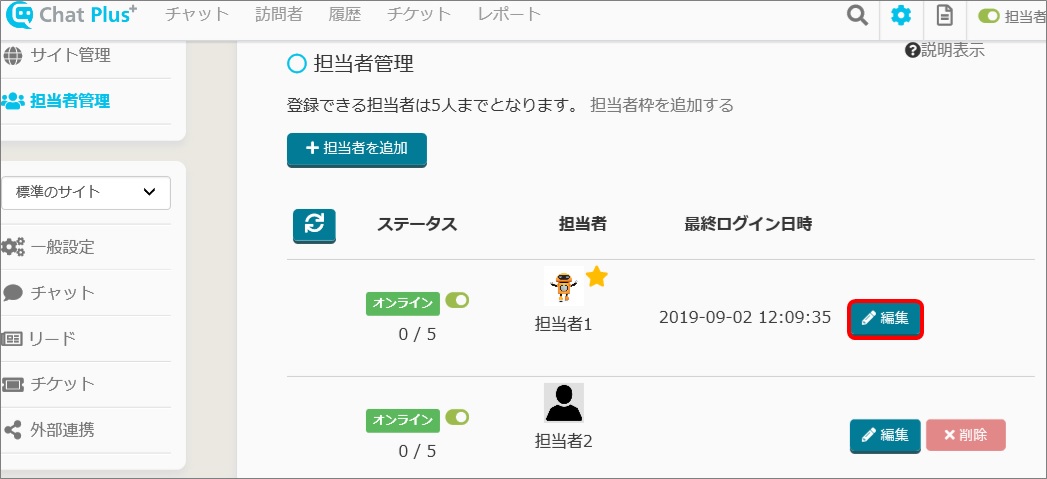
(4) [Edit Operator]'s window will show, in the section [Tag], enter tags that relates to the operator. ※It will be used later when we set to route the chat to operators with applicable tags. 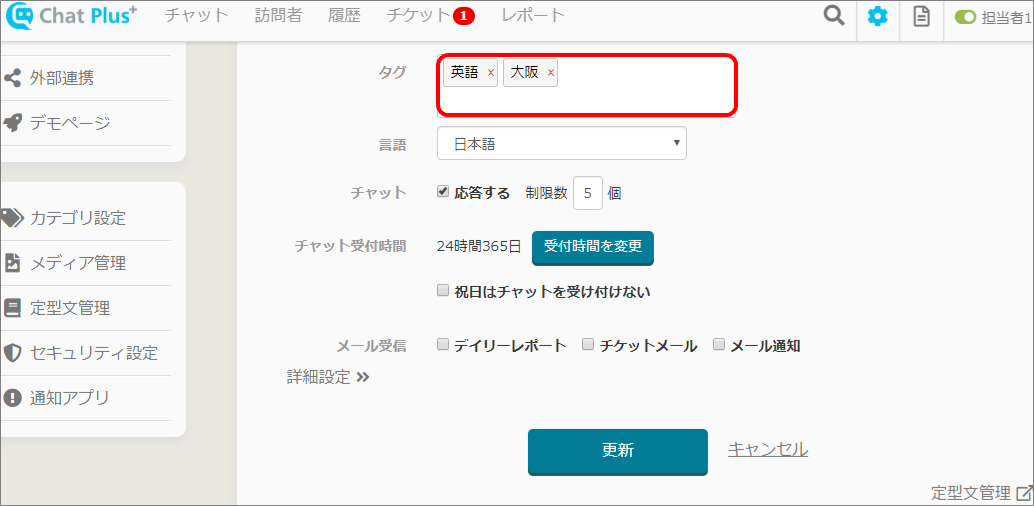
(5) Click on [Update]. 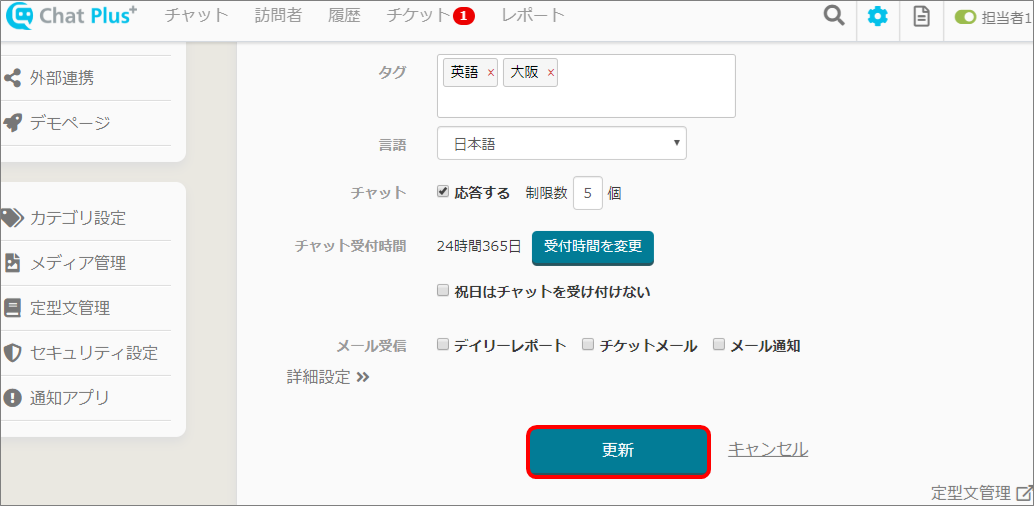
Routing setting
Do the routing setting using Chatbot+.
Here, as an example, it will explain how to route the chat from users to operators that has [English] tag. (1) Click on the setting button on the upper right of the management page.
(2) Click [Chat]>[Function]>[Chatbot+]. 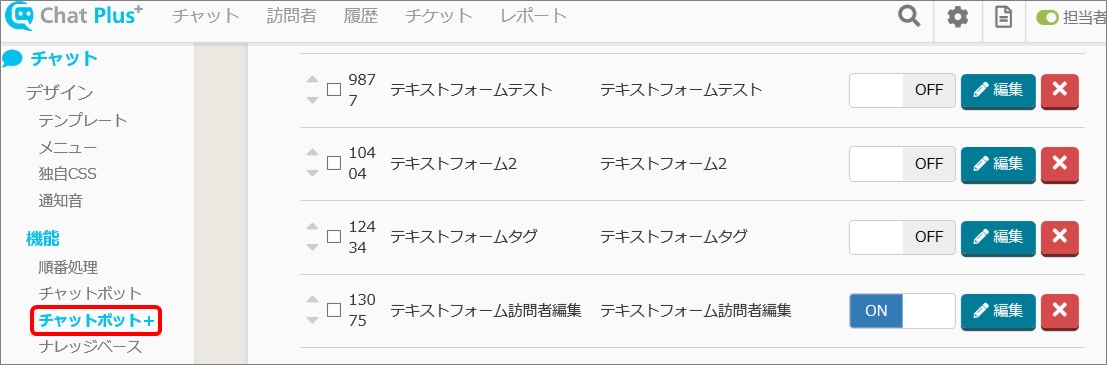
(3) Click on [Add parts]. 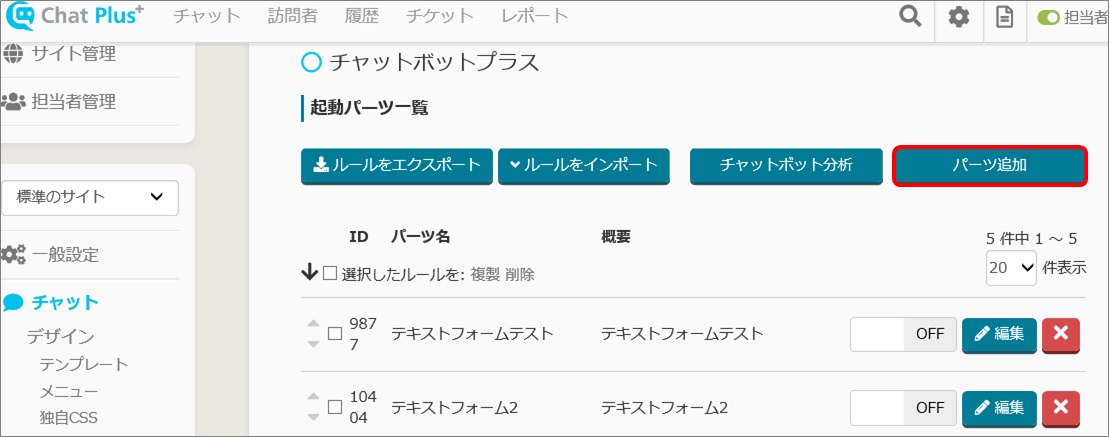
(4) Enter [Part's name] and [Detail]. ※Leave the box at the top right [ID] empty, it will automatically be filled when Chatbot+ is created. 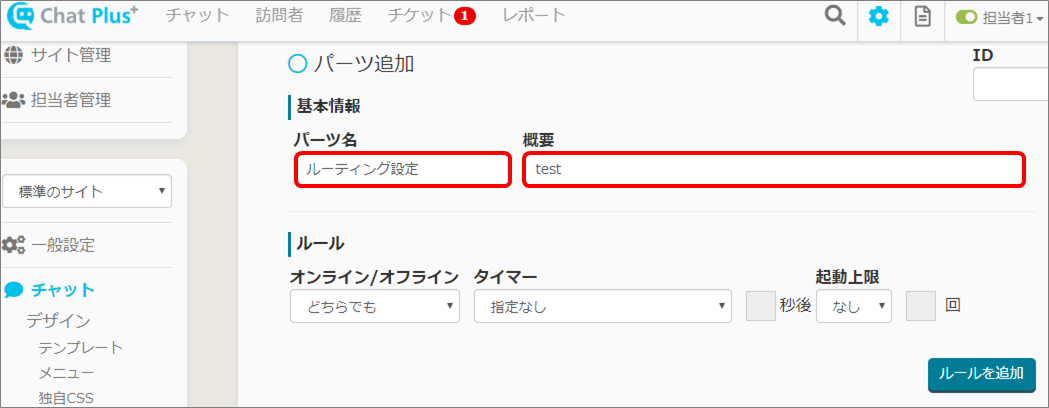
(5) Click on [Add rules]. 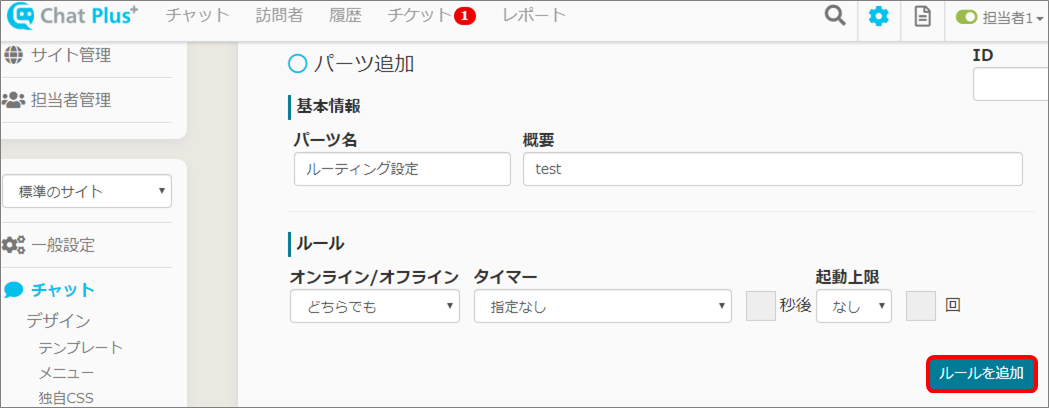
(6) In the section [Display rules], click on [User's remark] from the first pull down, enter [Chat in English] in the second box, and click [Match] from the third pull down. 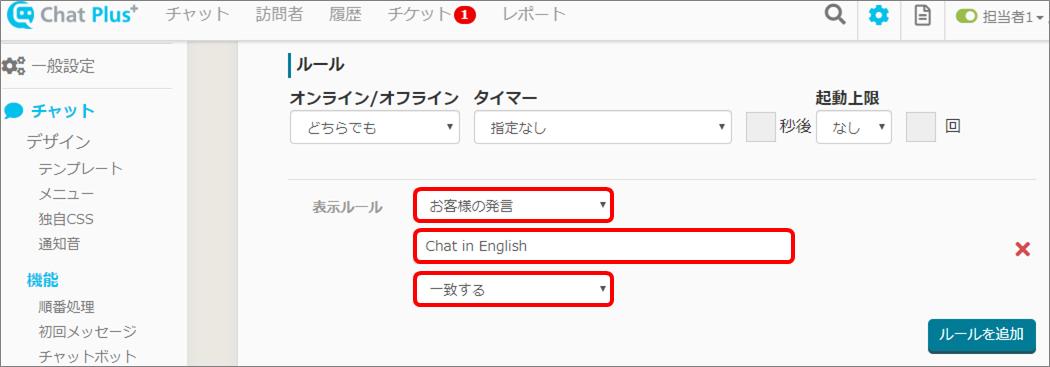
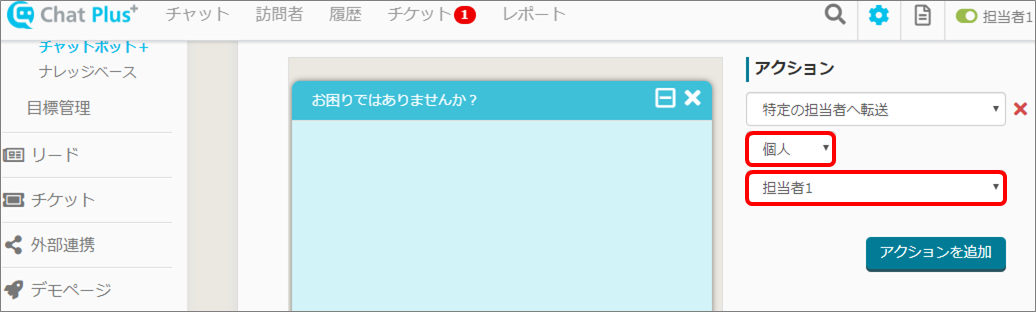
(7) In the section [Action], click on [Forward to specific operator] from the pull down. 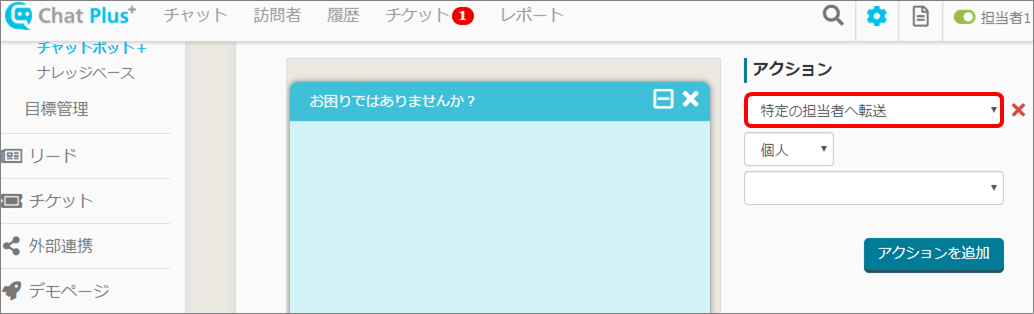
(8) Click on [Tag] from the pull down below, and enter [English] in the box below. 
(9) Click on [Update]. 
Change correspondence depending on routed operator's status
By adding setting to [Do the routing setting using Chat bot+] above, you can change correspondence depending on routed operator's status [Online/Offline]. ■Online As an example, it will explain how to route the chat when the applicable operator is online.
(1) Click on [Add rules]. 
(2) In the section [Display rule], click on [AND] from the first pull down, click [Operator's status with appropriate tag] from the pull down next to it, enter tag's name in the box below, and click on [Online] from the forth pull down. 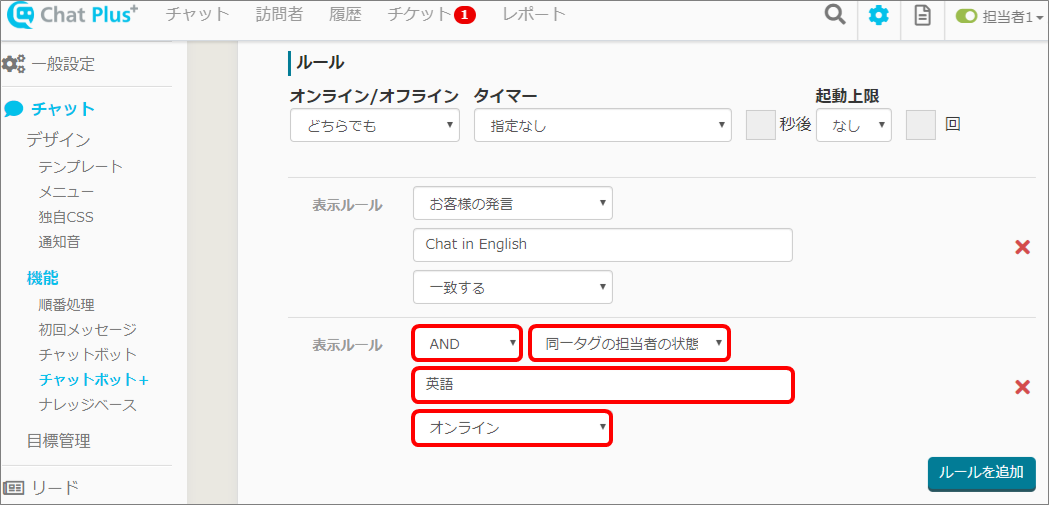
(3) In the section [Action], click on [Forward to specific operator] from the pull down.
(4) From the pull down below (3), click on [Tag], enter [English] in the box below.
(5) Click on [Update].
■Offline As an example, it will explain how to route the chat when the applicable operator is offline.
(1) Click on [Add rules].
(2) In the section [Display rule], click on [AND] from the first pull down, click on [Operator's status with appropriate tag] from the second pull down, enter tag's name in the box, and click on [Offline] from the fourth pull down. 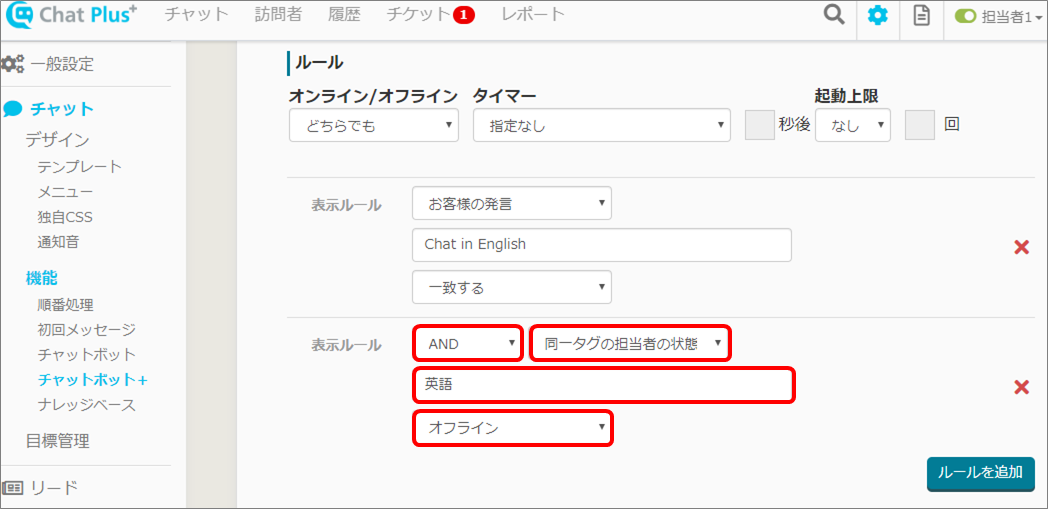
(3) In the section [Action], click on [Message] from the pull down, and enter message in the box below. 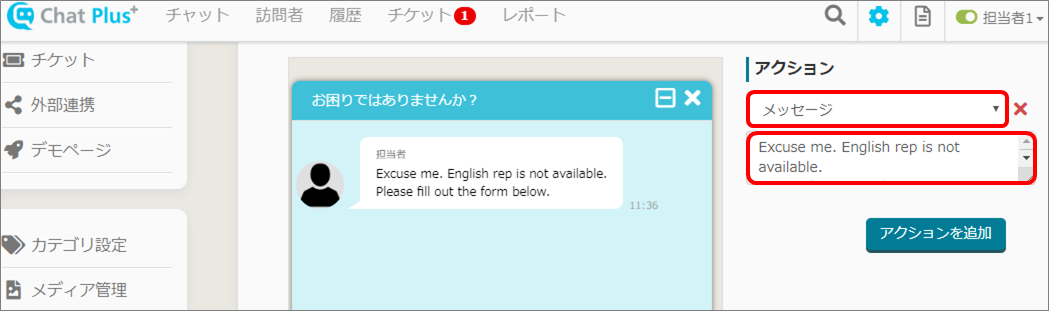
(4) Click on [Add actions]. 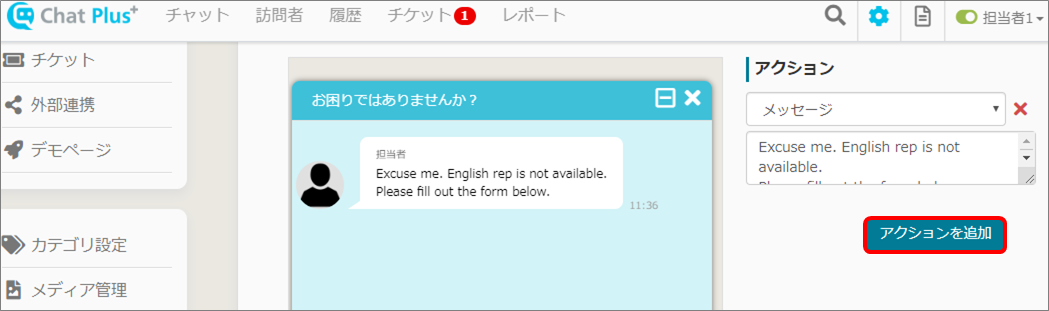
(5) Click on [Text form] from the pull down and set rules. 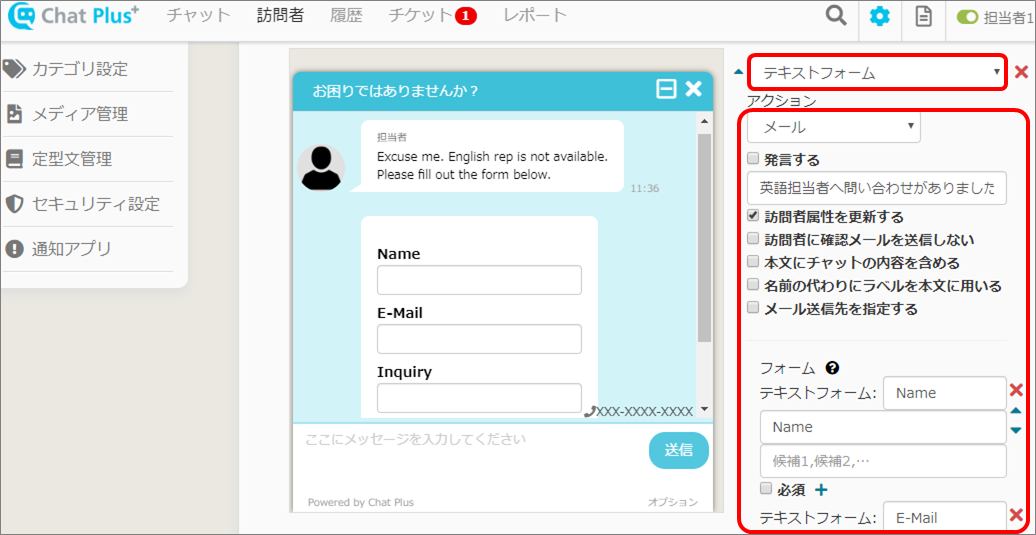
(6) Click on [Update].