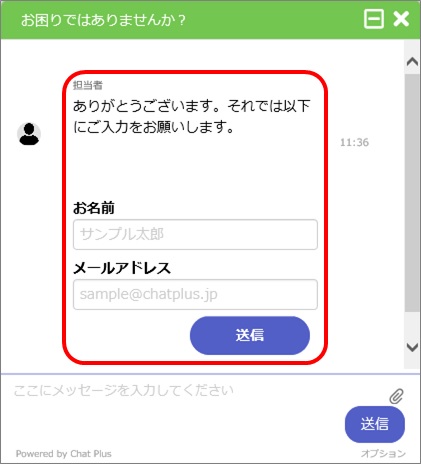
By using Chatbot+, you can create a text form. In here, it explains how to display a text form to enter names and email addresses when a user clicked on [I want to request documents].
How to add a text form
(1) Click on the setting button on the upper right of the management page.
(2) Click on [Chat]>[Function]>[Chatbot+] on the left side of the screen.
(3) Click on [Add parts].
(4) In the section [Basic information], write in boxes [Part’s name] and [Details].
(5) In the section [Rule], click on [Add rules].
(6) Click on [User’s remark] from the first pull down, write in the box below what you want to match with, (in this case [I want to request documents]), and select [Match] from the pull down below.
(7) In the section [Action], select [Message] from the pull down.
(8) In the box below, write down a message. (In this case [Thank you. Please enter your information below]).
(9) Click on [Add actions].
(10) Select [Text form] form the pull down.
(11) Click on [Ticket] from the action pull down.
(12) In the subject text area, write down [Documents requested]. ※This will be the title of the ticket.
(13) Enter [PerhapsName], [Name], [John Smith] in the text area for each [Name], [Label], and [Candidate]. 
(14) Click on [Add form contents].
(15) Click on [Text form].
(16) Enter [PerhapsEmail], [Email address], [sample@chatplus.jp] in the text area for each [Name], [Label], and [Candidate]. 
(17) From the pull down [Action after sent], click on [User message] and write down [Sent] in the box below.
(18) Click on [Update].
 Other usages are described in here


