With Chat Plus, you can customize a form before starting a chat.
Form setting before starting a chat
(1) Click on the setting button on the upper right of the management page.
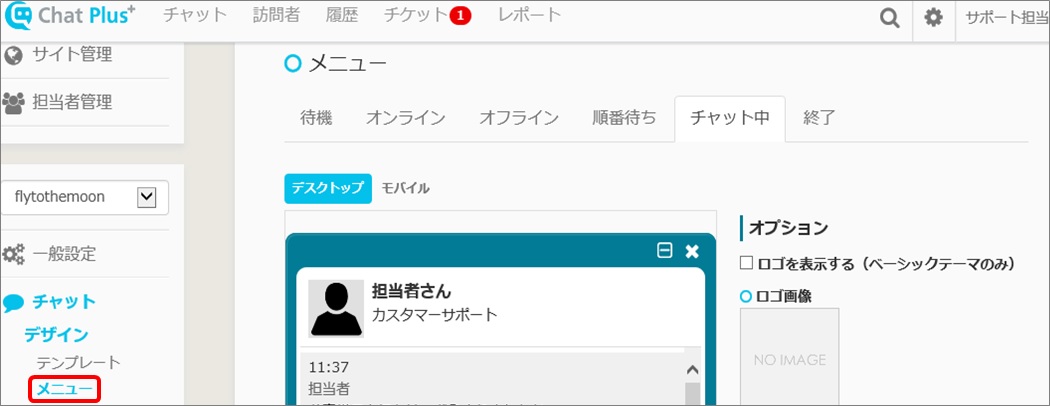
(2) Click on [Chat]>[Design]>[Menu] on the left side of the screen.
(3) Click on [Online] tab.
(4) Check in boxes which you want to display.
※Check in the box "required", applicable contents will be required to fill.
(5) Click on [Update].
Detailed Setting
Change error sentence when [title], [entering example], [not-entered・false entered]
(1) Click on [Detailed Setting].
(2) You can change the error sentence when [title], [entering example], [not-entered・false entered] in boxes shown.
(3) Click on [Update].
Add free contents
(1) Click on [Detailed Setting].
(2) Click on [+Add free contents].
(3) Click and write in boxes.
1:Enter title
2:Choose question type from the pull down.
※Choose from "Text", "Text Area", "Radio Button", "Check Box", and "Select Box".
3:Check and you can make the designated contents to be required.
4:Add questions/Choices. If you punctuate with「,」, you can add choices.
(4) Enter text in the box [Text for starting a chat].
(5) Click on [Update].
(6) Confirm the preview screen is updated.
Reflected screen of entered information
Information entered in the form is reflected on the chat screen [User information].
Things put in [Free Contents] can be confirmed in [User detailed screen] after clicking the name.
Confirm in history page
You can confirm the information acquired in the form before starting a chat in history page.
(1) Click on [History].
(2) Click on the chat you want to see from the list.
(3) You can confirm the information entered in the form before starting a chat.


