In Chatbot+, you can save the content entered in text form to Google Spread Sheet. Google Spread Sheet is a spreadsheet software provided by Google, and you can enter functions and create graphs like Excel. Also, what it differs from Excel is that it can be edited at the same time and has automatic save function. In here, it will explain how to link this very convenient Google Spreadsheet with Chat Plus.
Prepare Google Spreadsheet
Installation of cord
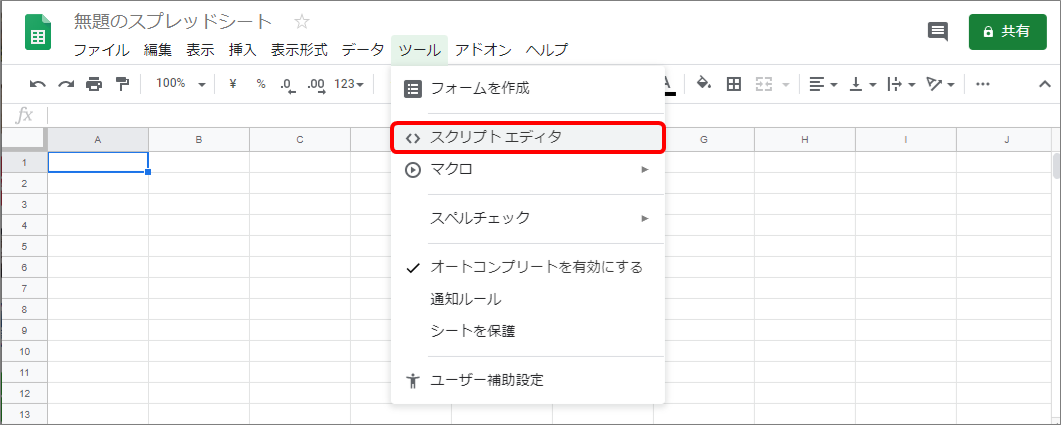
(1) Open Google Spreadsheet to record the content, and click on [Tool]>[Script editor] from the menu.
※If you do not have Google Spreadsheet, create a new one.
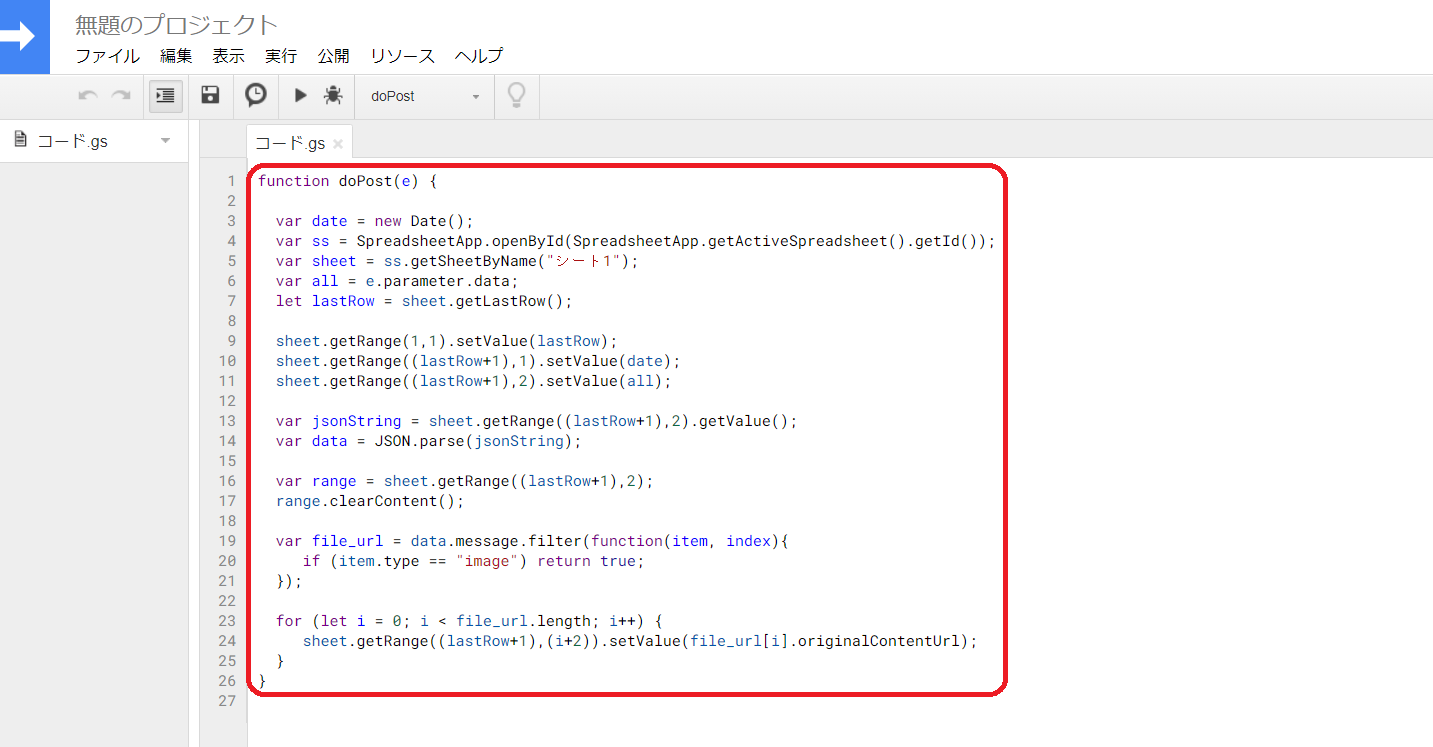
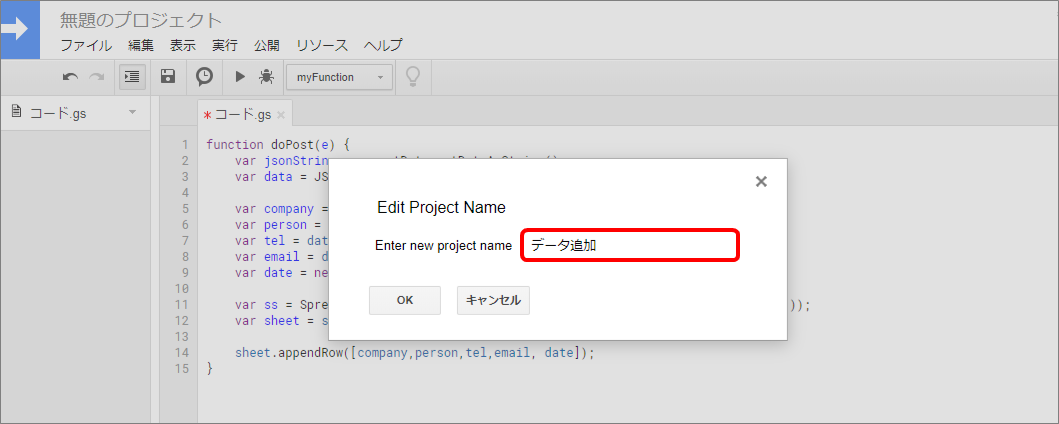
(2) When you open [Script Editor], an editor written like [function myFunction() { }] this will shown, so copy the code written below and overwrite the editor and paste.
function doPost(e) {

  var date = new Date();
  var ss = SpreadsheetApp.openById(SpreadsheetApp.getActiveSpreadsheet().getId());
  var sheet = ss.getSheetByName("シート1");
  var all = e.parameter.data;
  let lastRow = sheet.getLastRow();

  sheet.getRange((lastRow+1),1).setValue(date);
  sheet.getRange((lastRow+1),2).setValue(all);

  var jsonString = sheet.getRange((lastRow+1),2).getValue();
  var data = JSON.parse(jsonString);

  var range = sheet.getRange((lastRow+1),2);
  range.clearContent();

  var file_url = data.message.filter(function(item, index){
     if (item.type == "image") return true;
  });

  for (let i = 0; i < file_url.length; i++) {
     sheet.getRange((lastRow+1),(i+2)).setValue(file_url[i].originalContentUrl);
  }
}

Googleスプレッドシートに反映
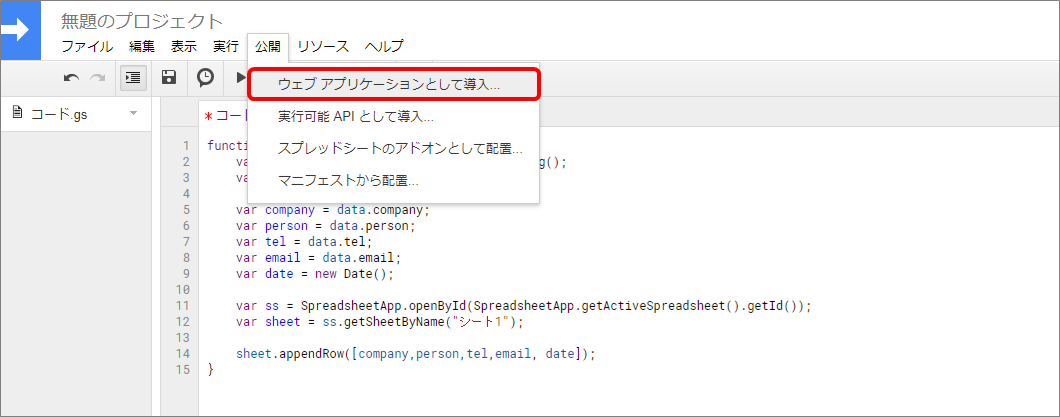
(1) Click on [Public]>[Install as a web application...] from Google Spreadsheet menu.
(2) You will be prompted to change the project name, so enter any project name.
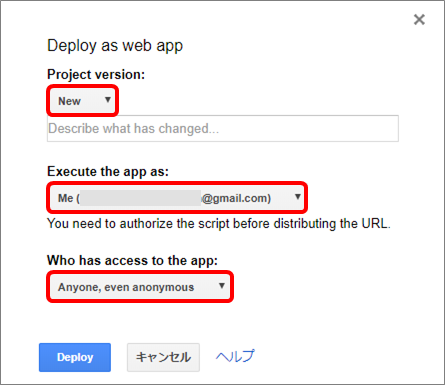
(3) The screen below will be shown, so click on [New] from [Project version] pull down, and click [Me] from [Execute the app as] pull down, and click [Anyone, even anonymous] from [Who has access to the app] pull down.
※After selecting [New] from the [Project version] pull down, enter any value in the frame. (can be left blank)
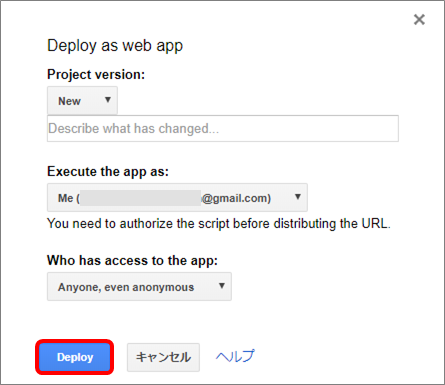
(4) Click on [Deploy].
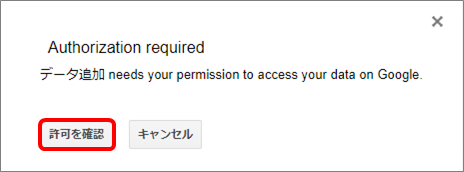
In that case, click on [Confirm permission]>[Choose account]>[Detail]>[Move data to add]>[Permit], and permit access to Google Spreadsheet.
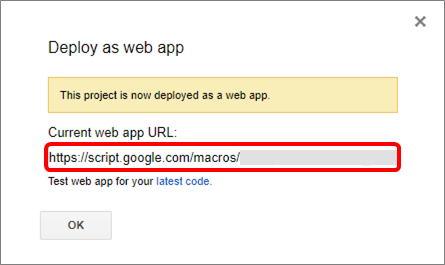
(5) A screen that tells [Complete deploy] will be displayed, so copy [Current web app URL] in the box.
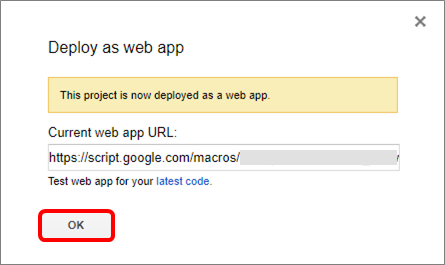
(6) Click on [OK].
Next, moving on to setting the API output of the chatbot.
Setting of API output
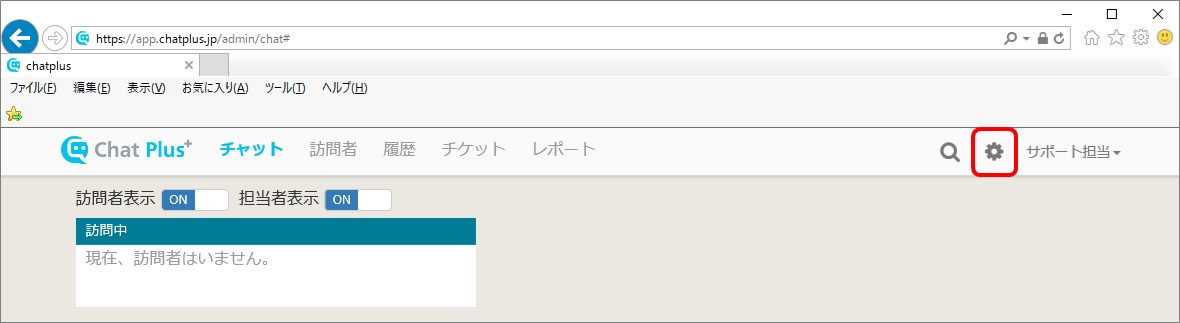
(1) Click on the setting button on the upper right of the management screen.
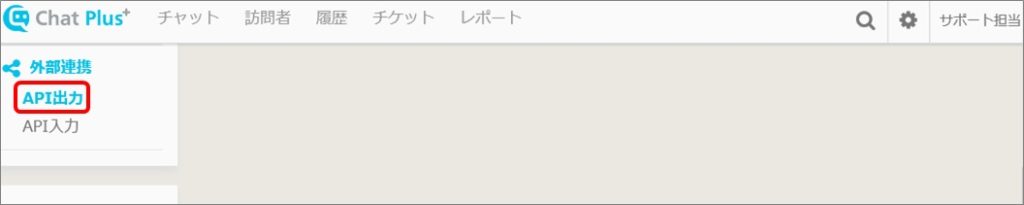
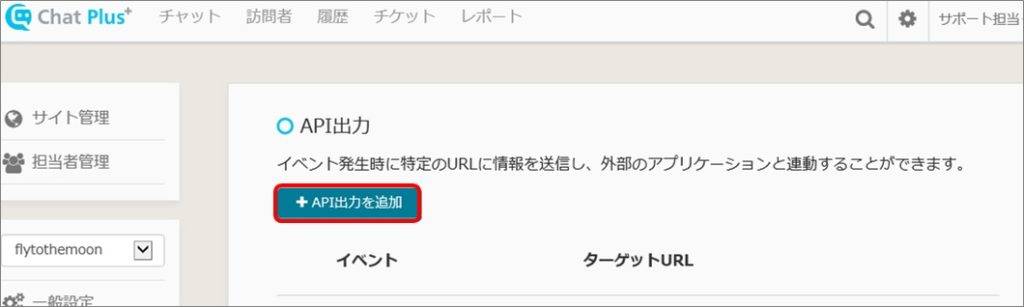
(2) Click on [External linkage]>[API output] on the left side of the screen.
(3) Click on [Add API output].
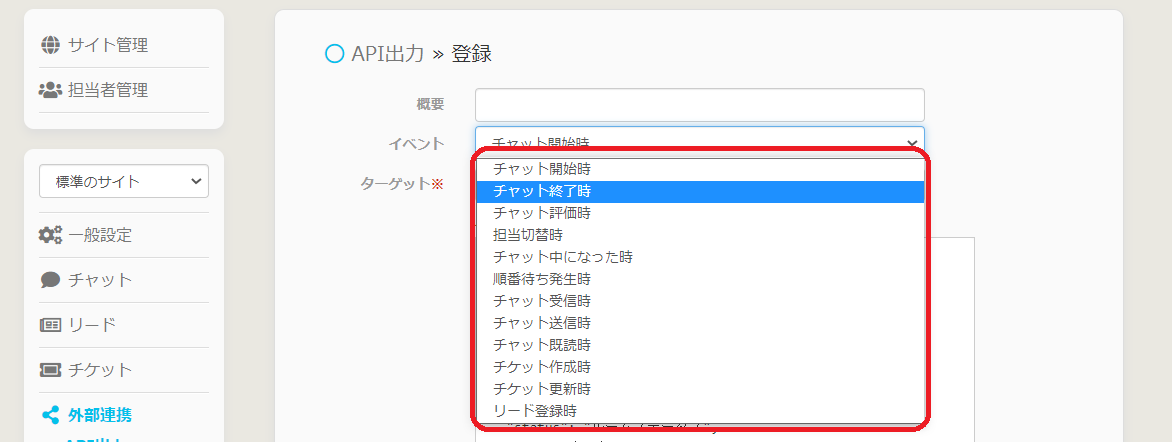
(4) You can choose when an event occurs to send data to the target URL. Choose and click from the right of the event pull down.
This time, we want to get the image at the time of chat, so select [At the end of chat].
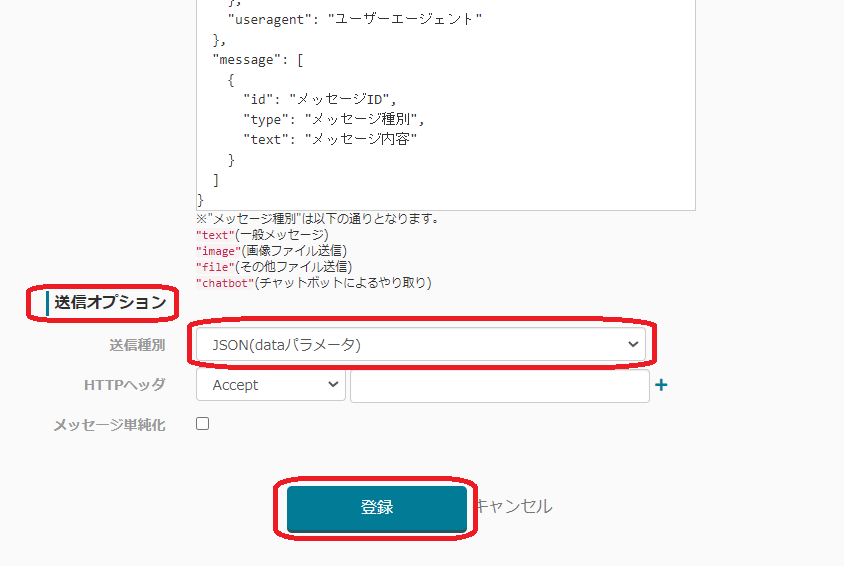
(5) Enter the URL of data destination in the target URL. Scroll down and click on [Send option].
Set the transmission type in the transmission options to [JSON (data) parameter] and click on the [Register].

(6) Confirm that the event and target URL registered in (5) have been added.
Finally, switch enable from OFF to ON.
※Click on [Edit] if you want to change it, or click on [Delete] if you want to delete it.

Operation check
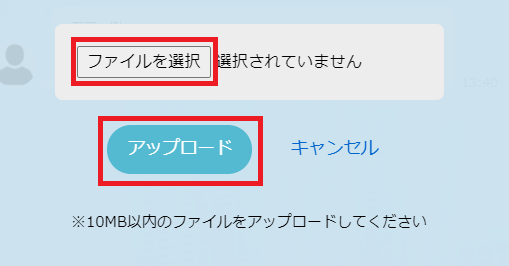
(1) Open chat screen and upload image.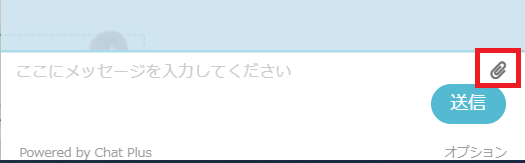
(2) Click on [Choose file], choose image you want to send and click on [Upload].
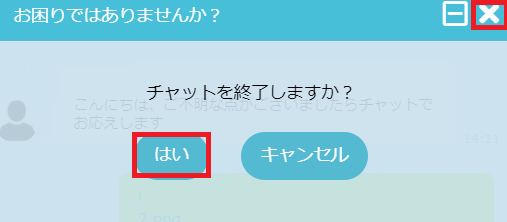
(3) End chat.
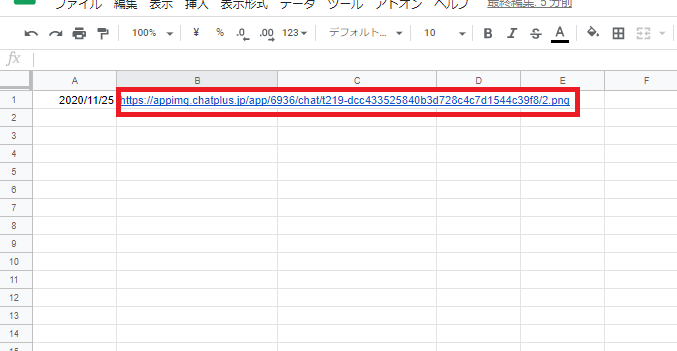
(4) Confirm created Google Spreadsheet, so that you can see that the content is reflected. If you click on the URL, you can see the image.