
1.About SSO (single sign-on)
With Premium subscription and higher subscriptions, you can set SSO using SAML 2.0 authentication.
This allows email addresses and passwords to be centrally managed with the identifier provider (IdP) and improves security.
2.How to configure SAML with Auth0
You need to create Auth0 before setting SSO.
2-1.How to create Auth0
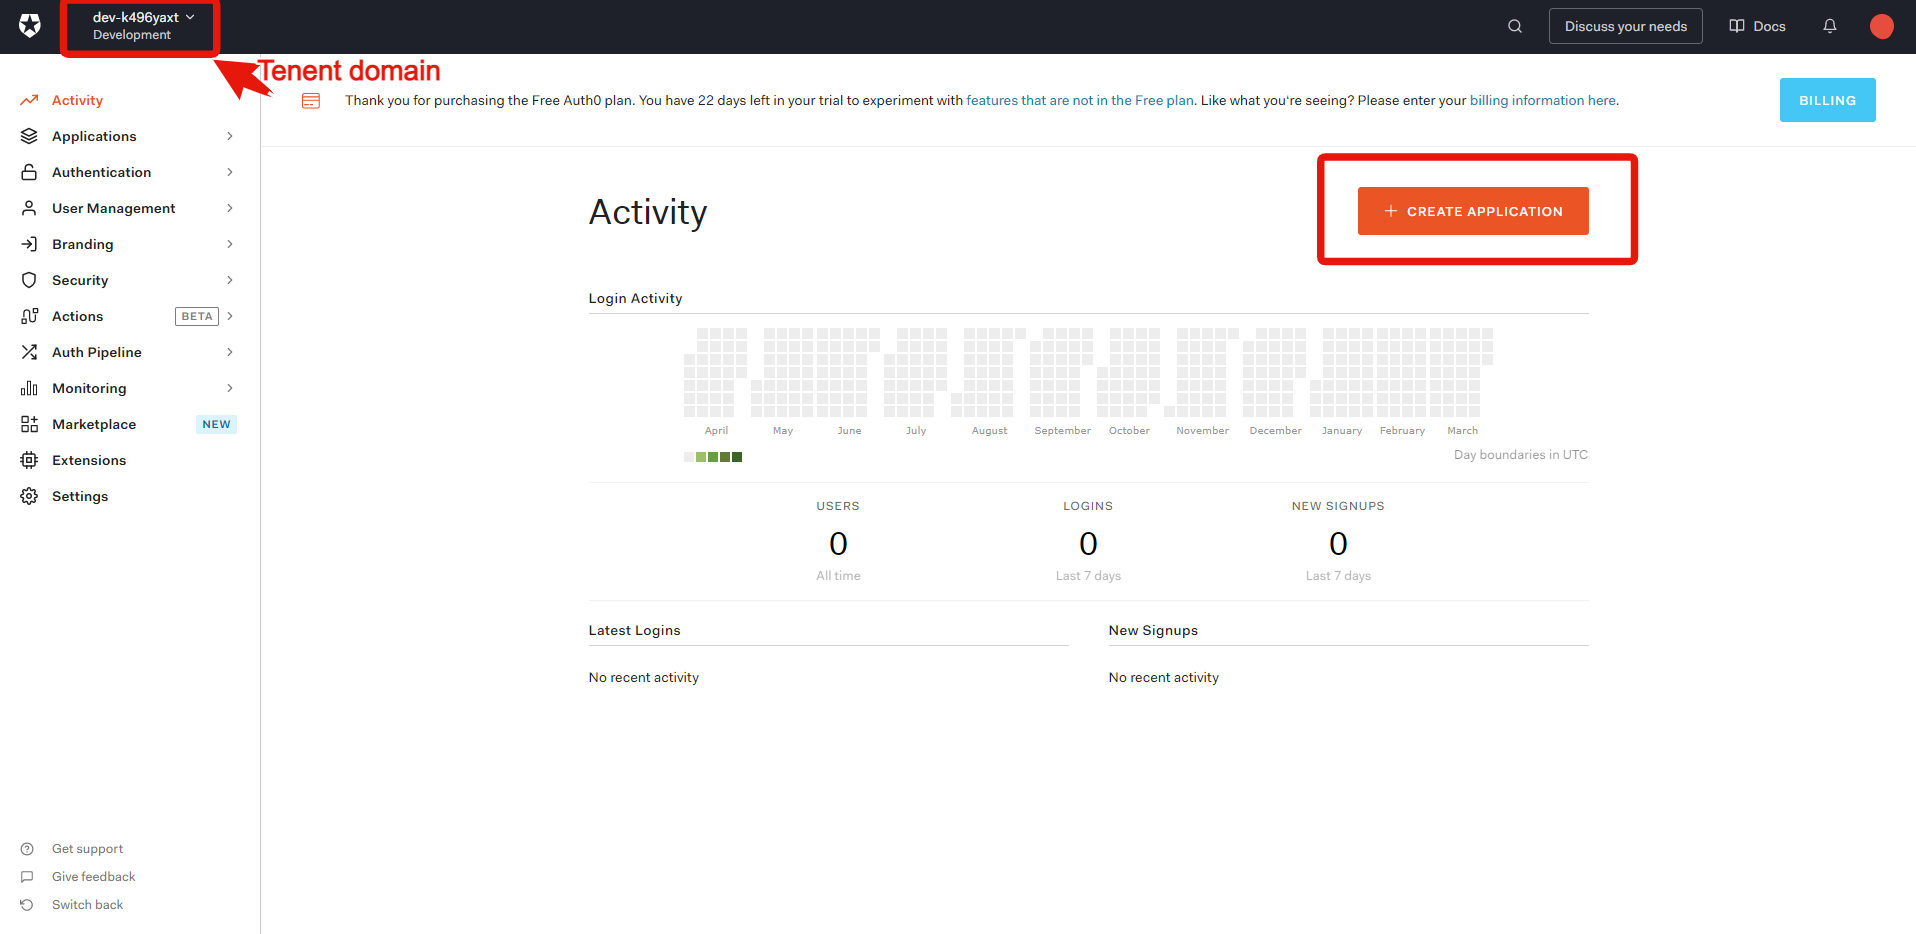
- Open the Auth0 home page and select [Create application].
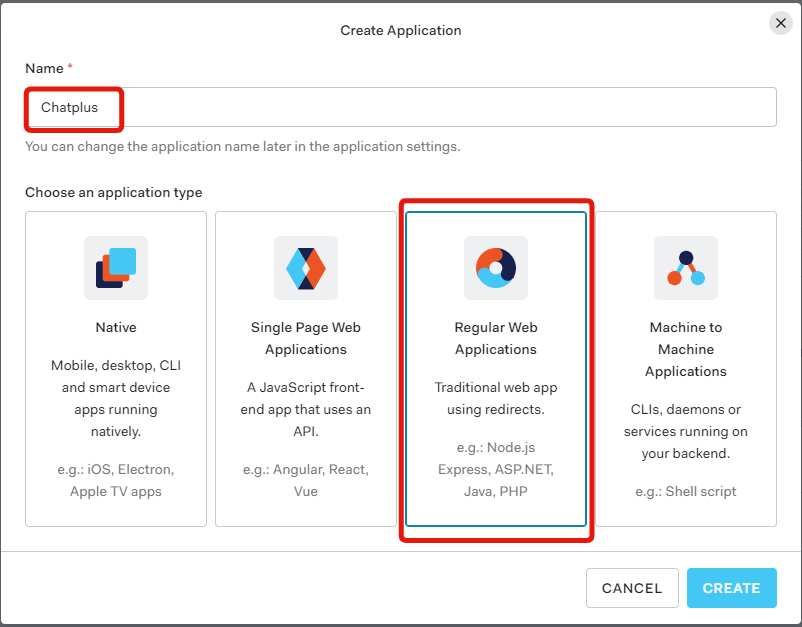
- In [Name], specify a name that can be recognized as Chat Plus.
In [Choose an application type] select [Regular Web Applications].
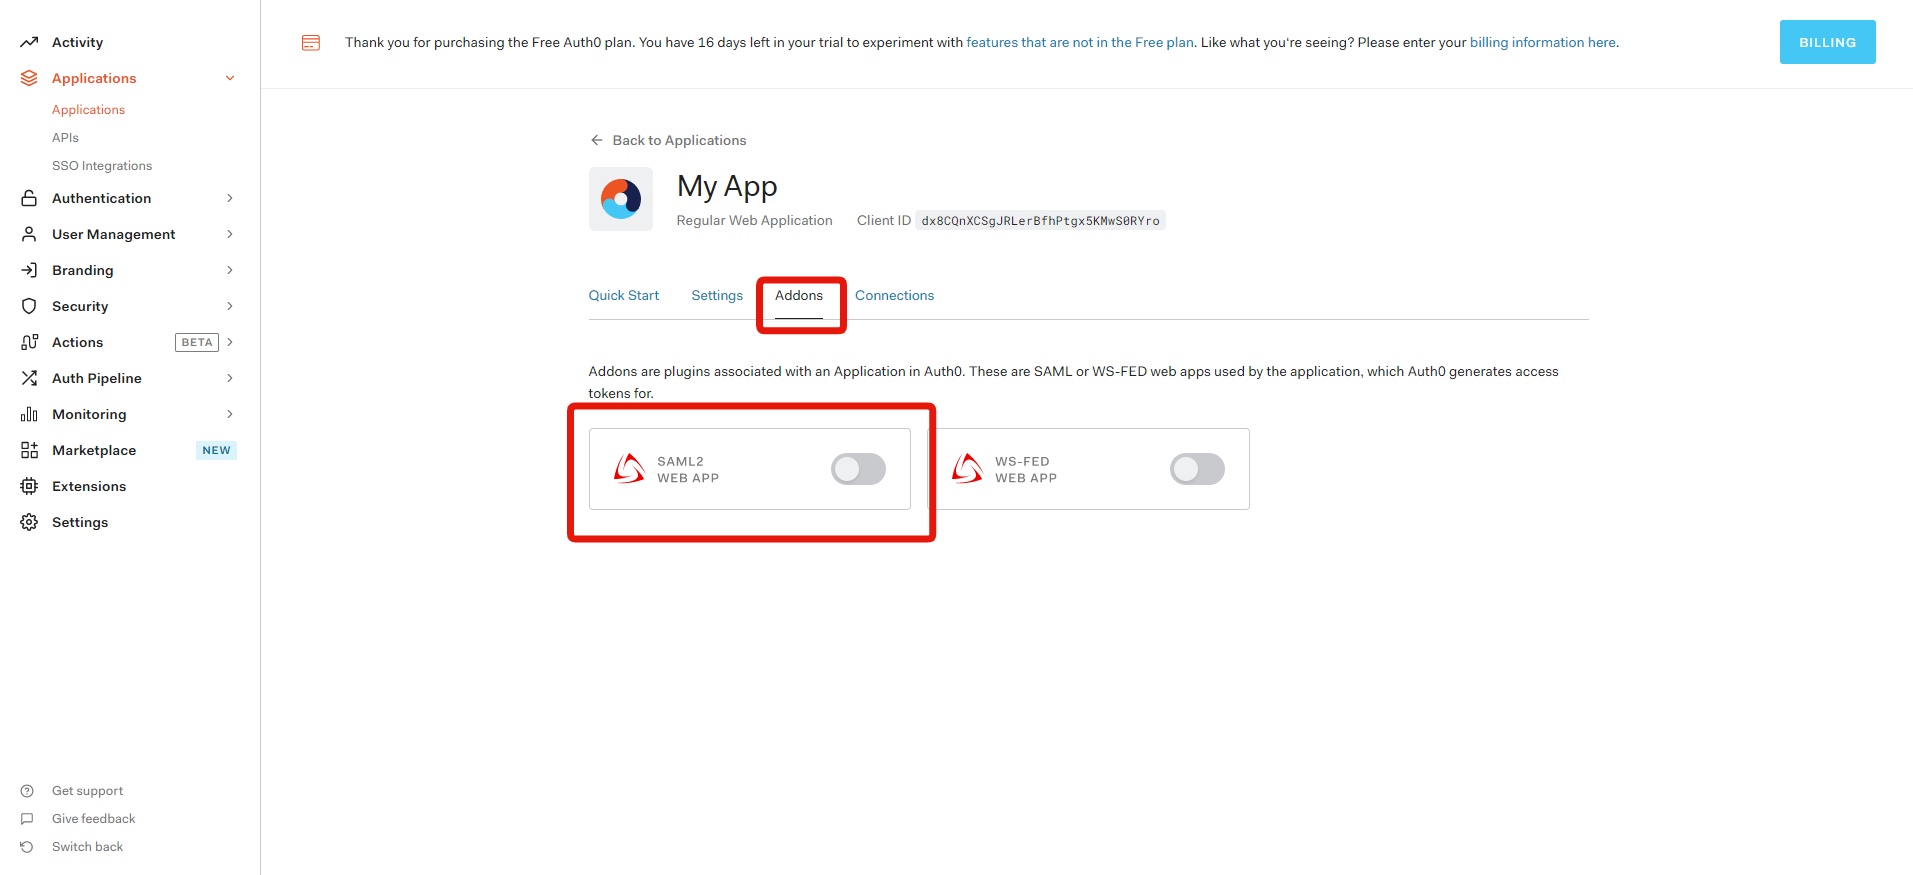
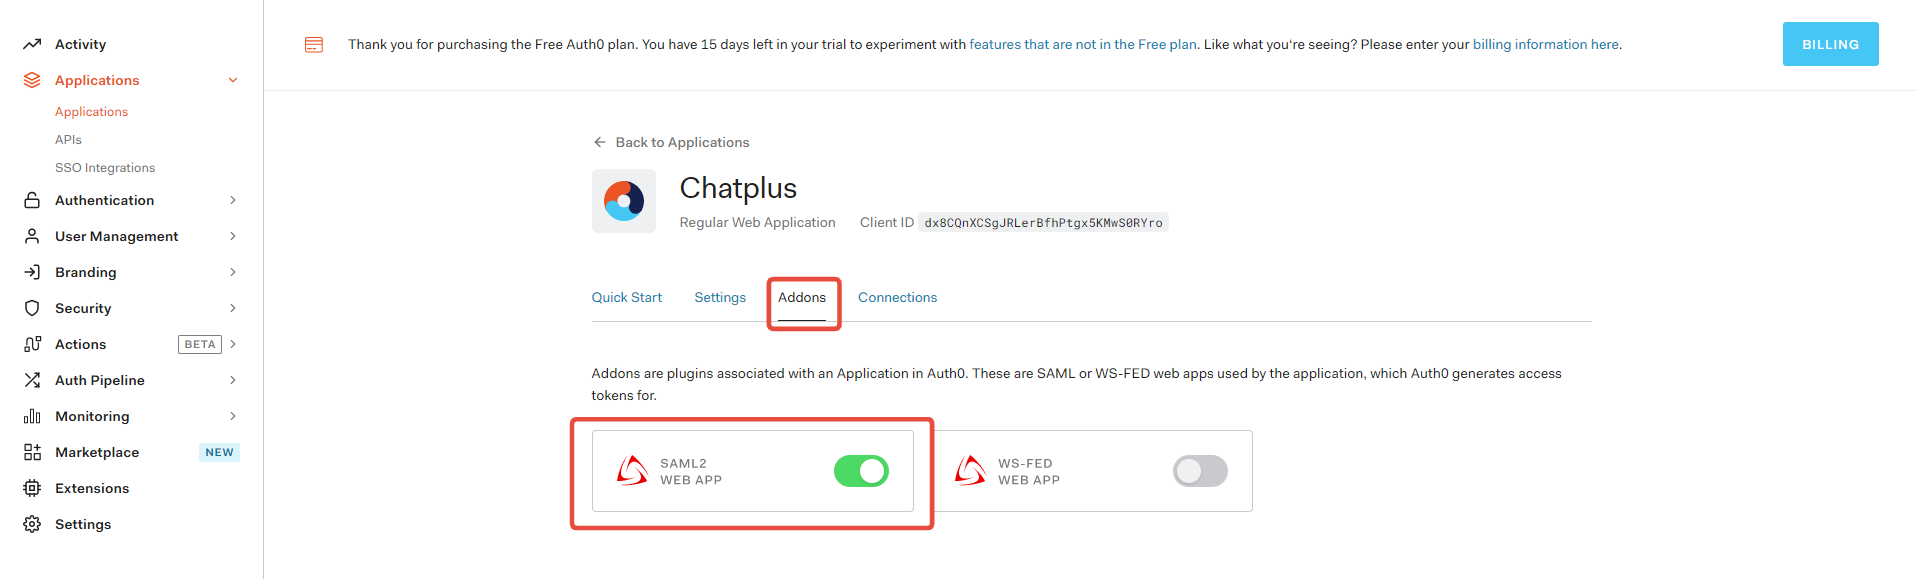
- Select [SAML2 WEB APP] in [Addons].
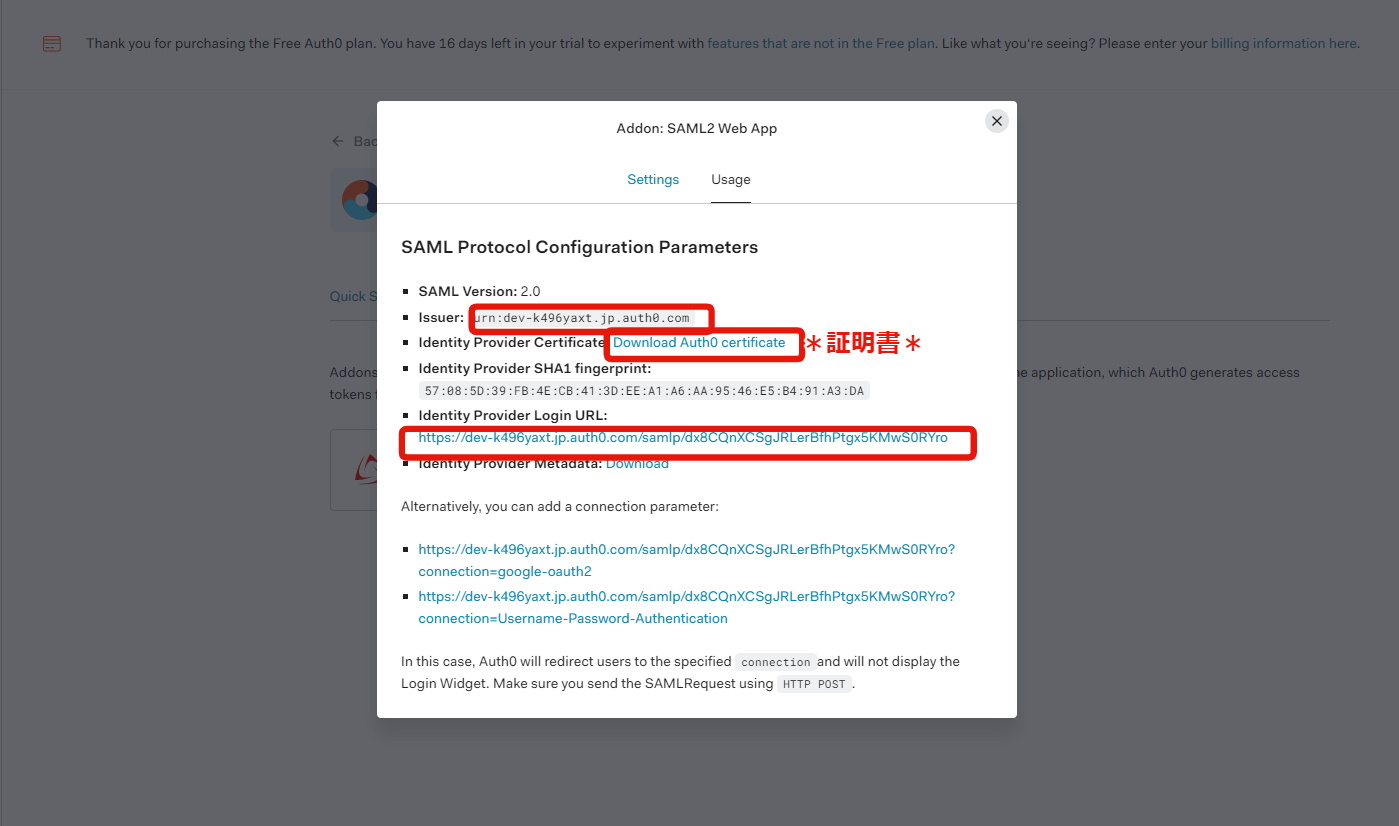
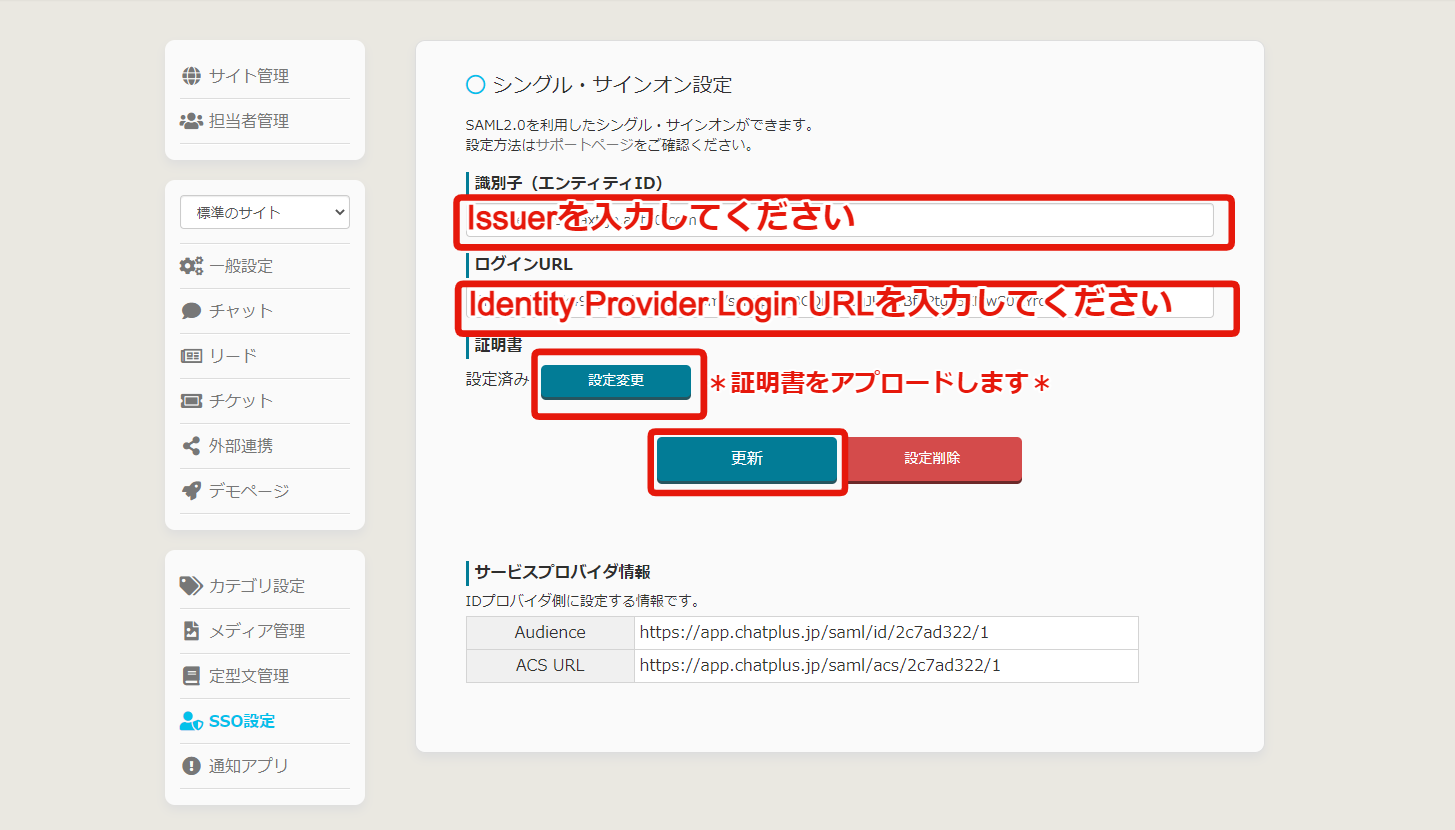
- Download the certificate by copying Issuer and Identity Provider Login URL. After that, enter each item on [SSO setup screen] of Chat Plus.
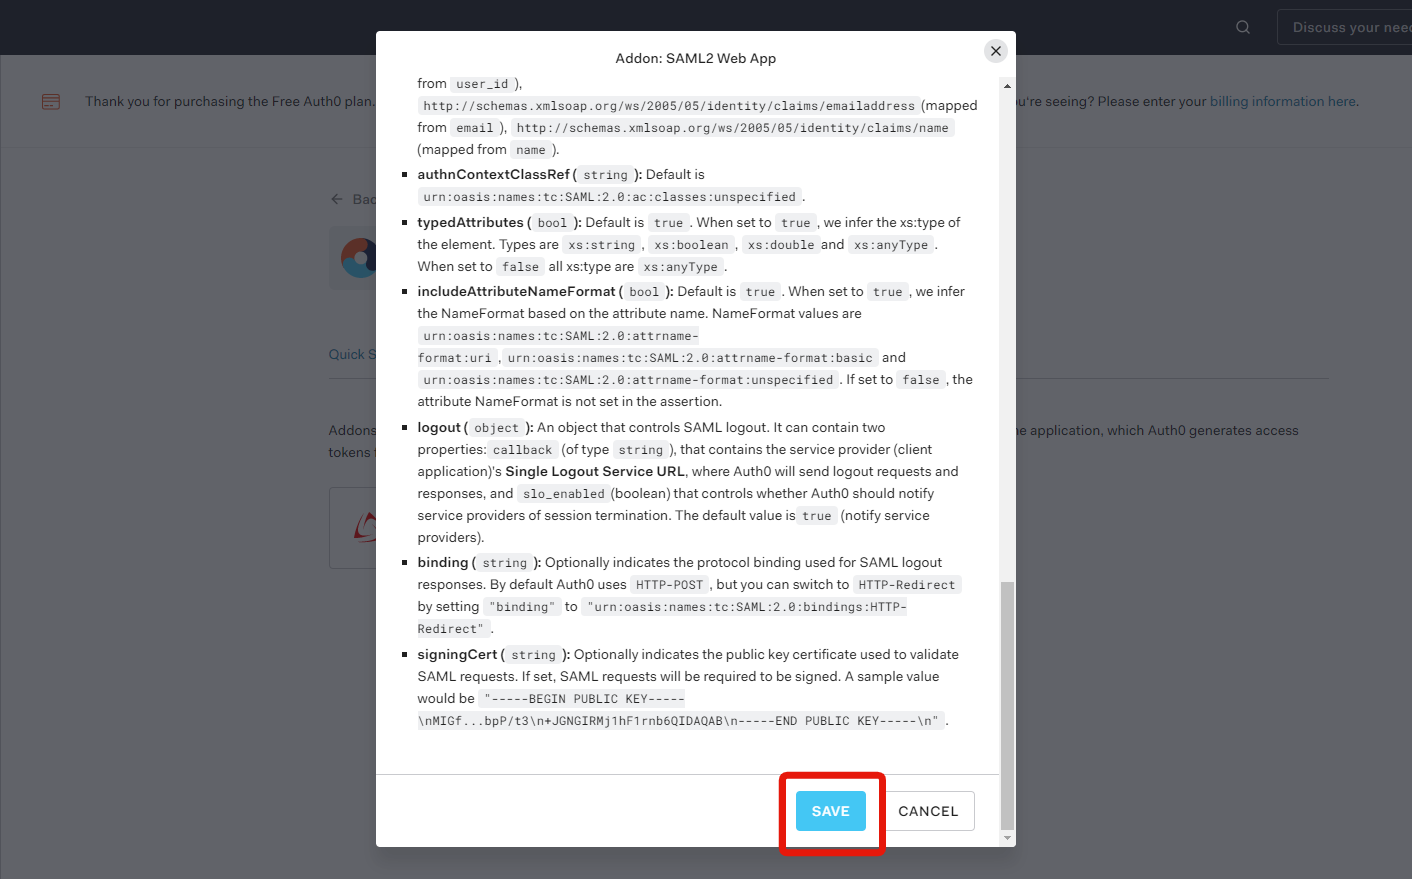
- When the entry is complete, click on [Save].
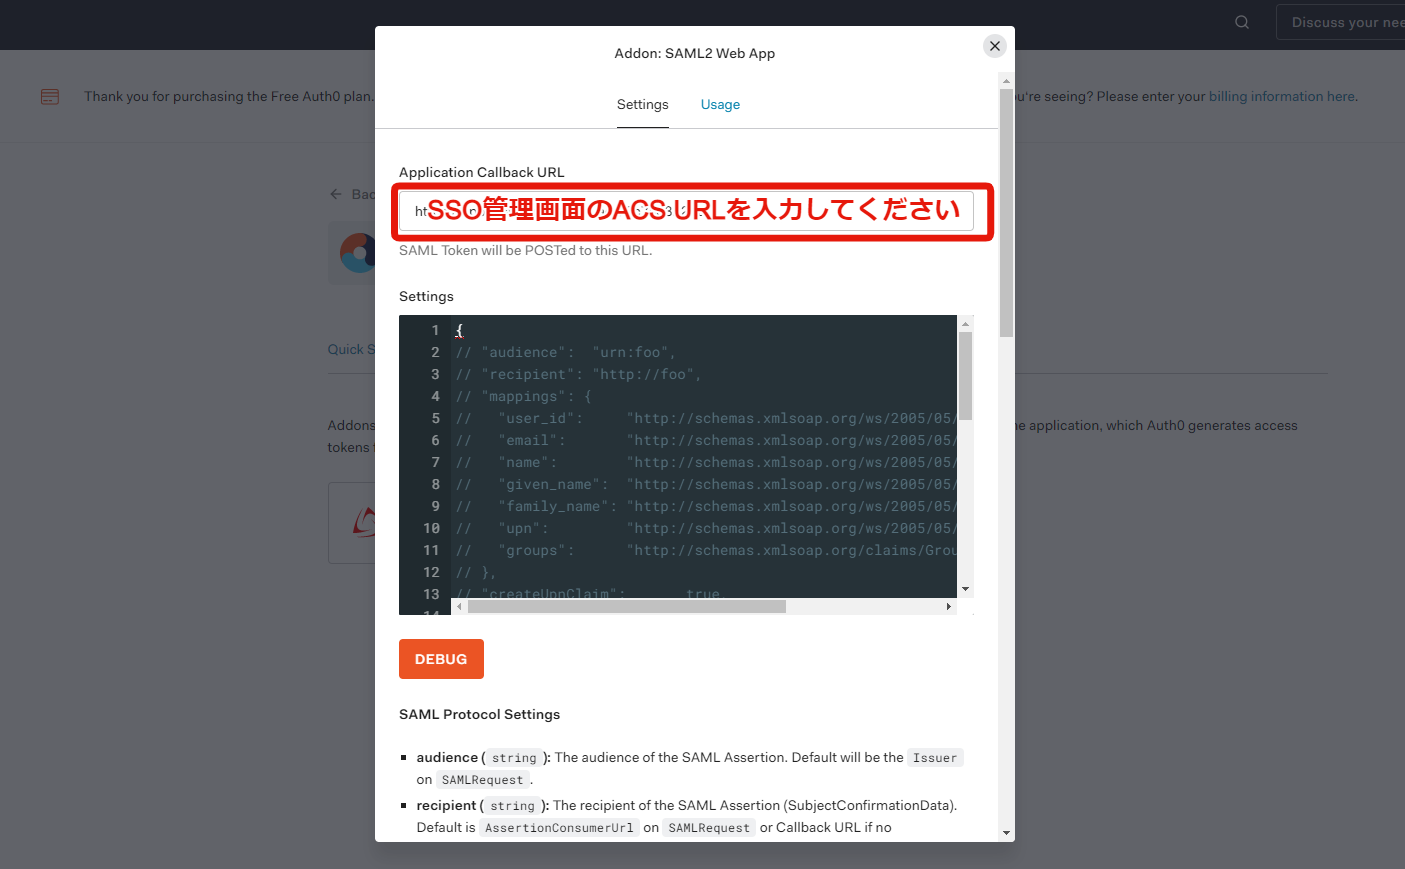
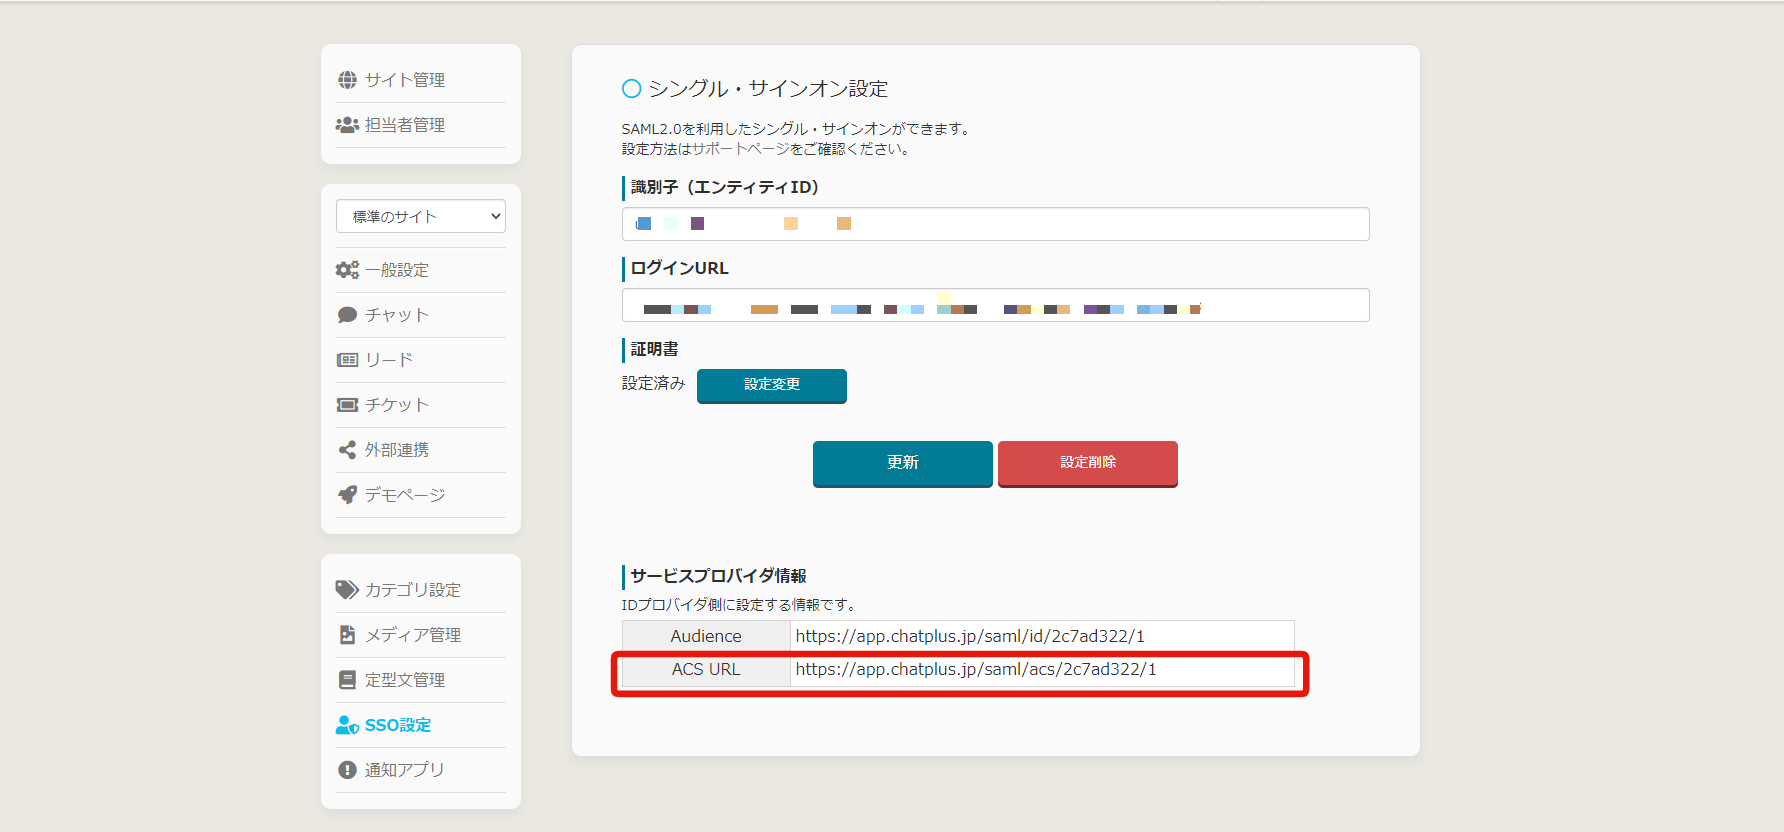
- Enter Application Callback URL while referring to the ACS URL in Chat Plus [SSO setup screen].
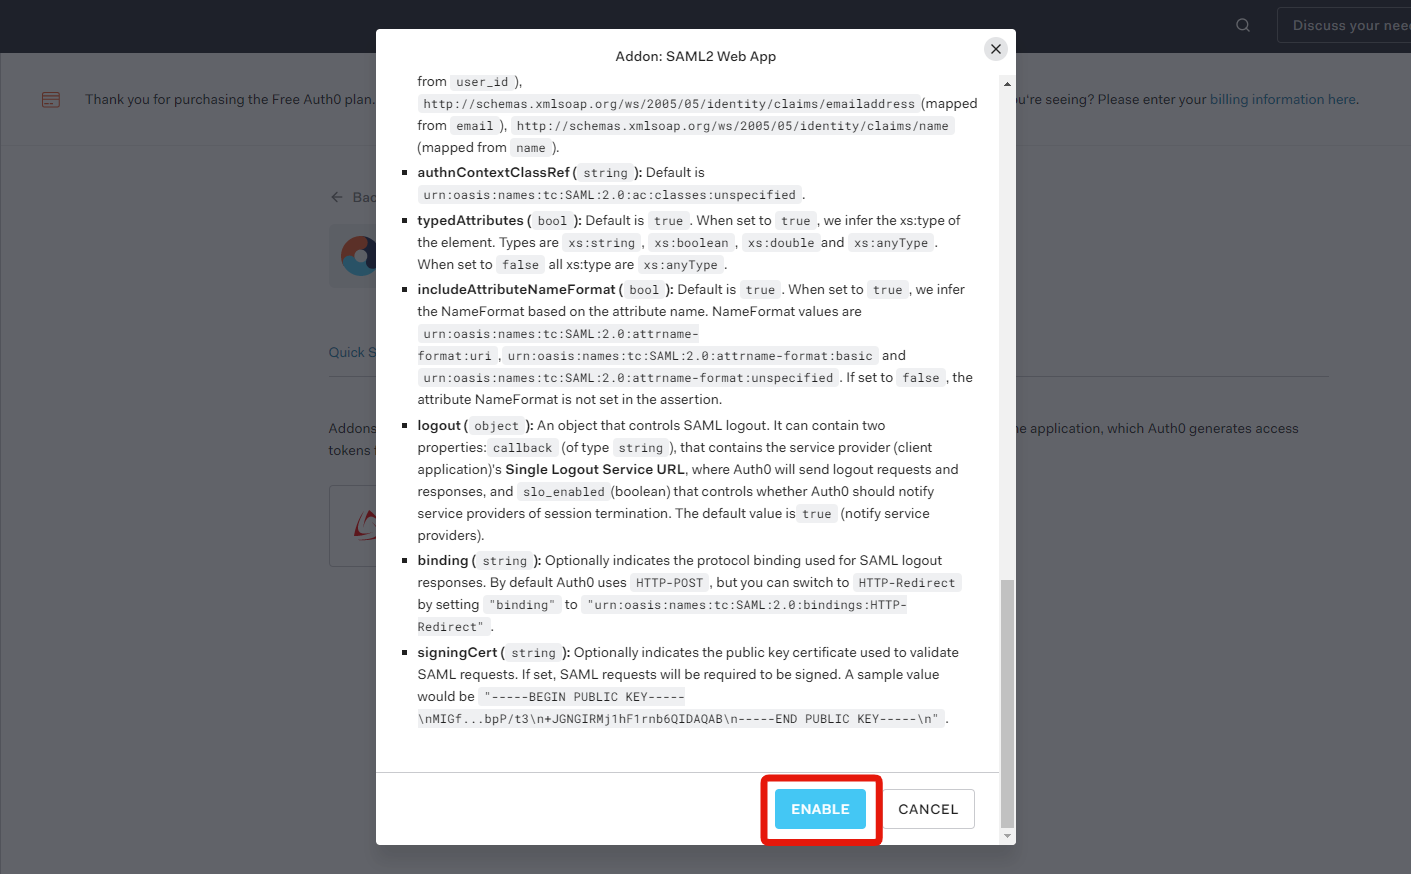
- After completing the entry, click [Enabale]> [Save].
2-2.Add user access to Chat Plus
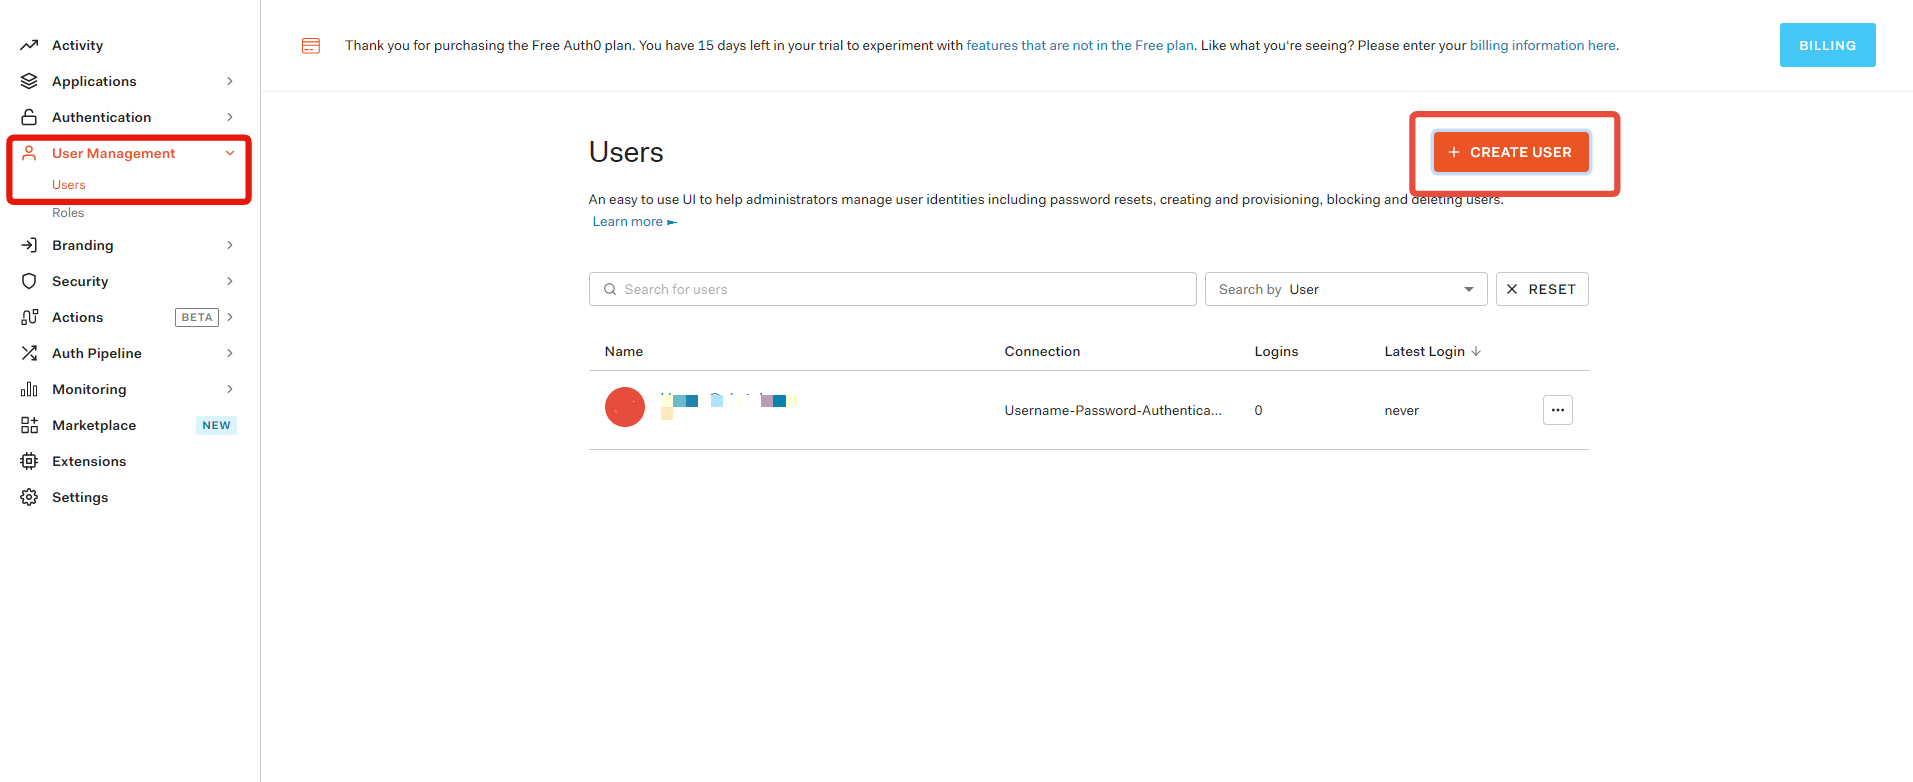
- On the Auth0 management screen, go to User management> User> Create user and then add a user authorized to access Chat Plus.
※The users authorized to access Chat Plus must be added beforehand by the operator, responsible for the management, on the Chat Plus side.
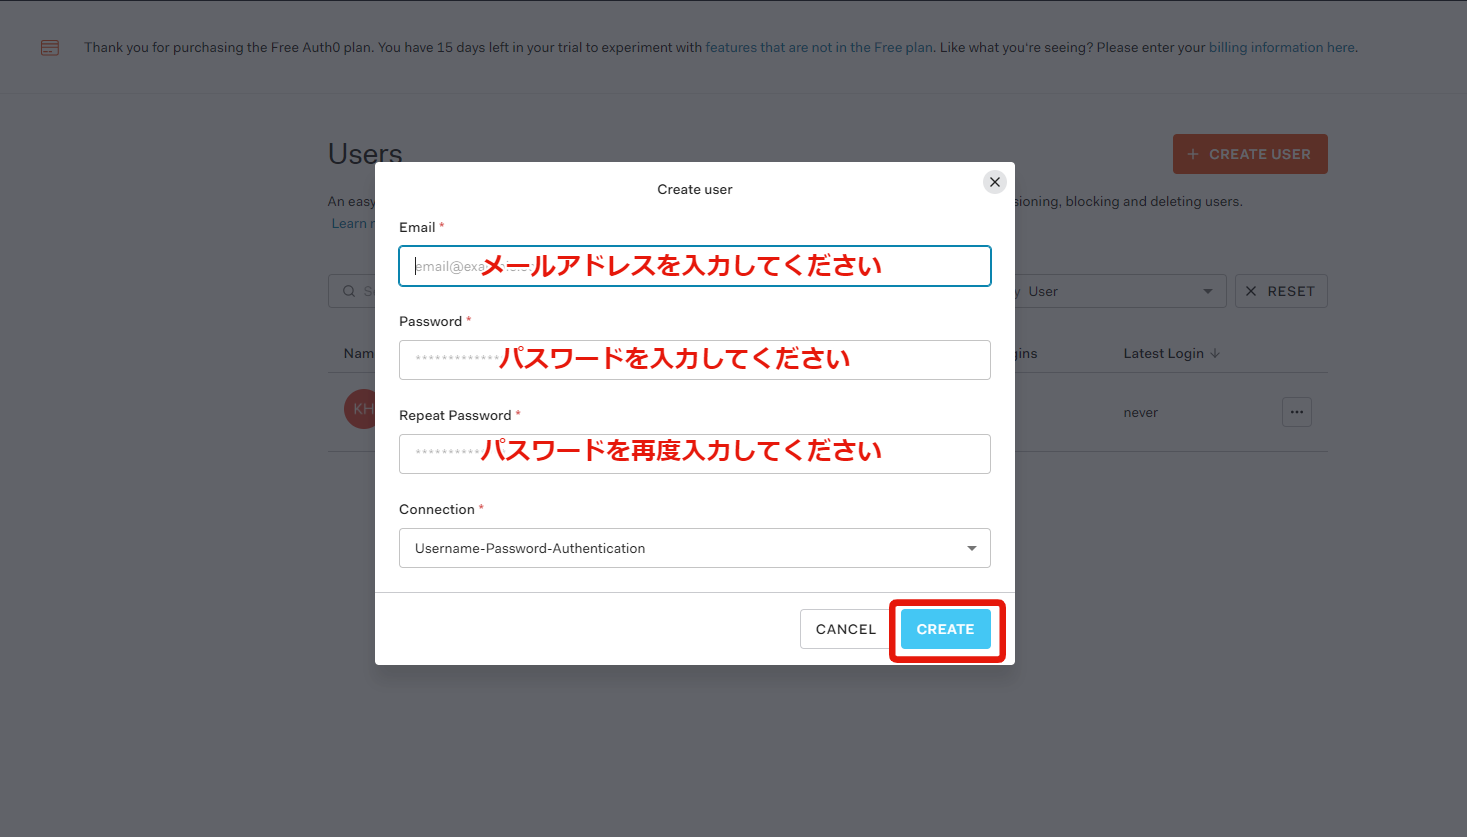
- Enter the user's email address. The password can be freely defined.
- Once the addition is complete, on the Auth0 management screen, go to Apps> Applications> Chat Plus and add the user authorized to access Chat Plus.

3.Operation test (performed by administrator)
- Select [Addons] to open the SAML2 WEB APP.
- Go to the link at the bottom of the [Usage] tab.
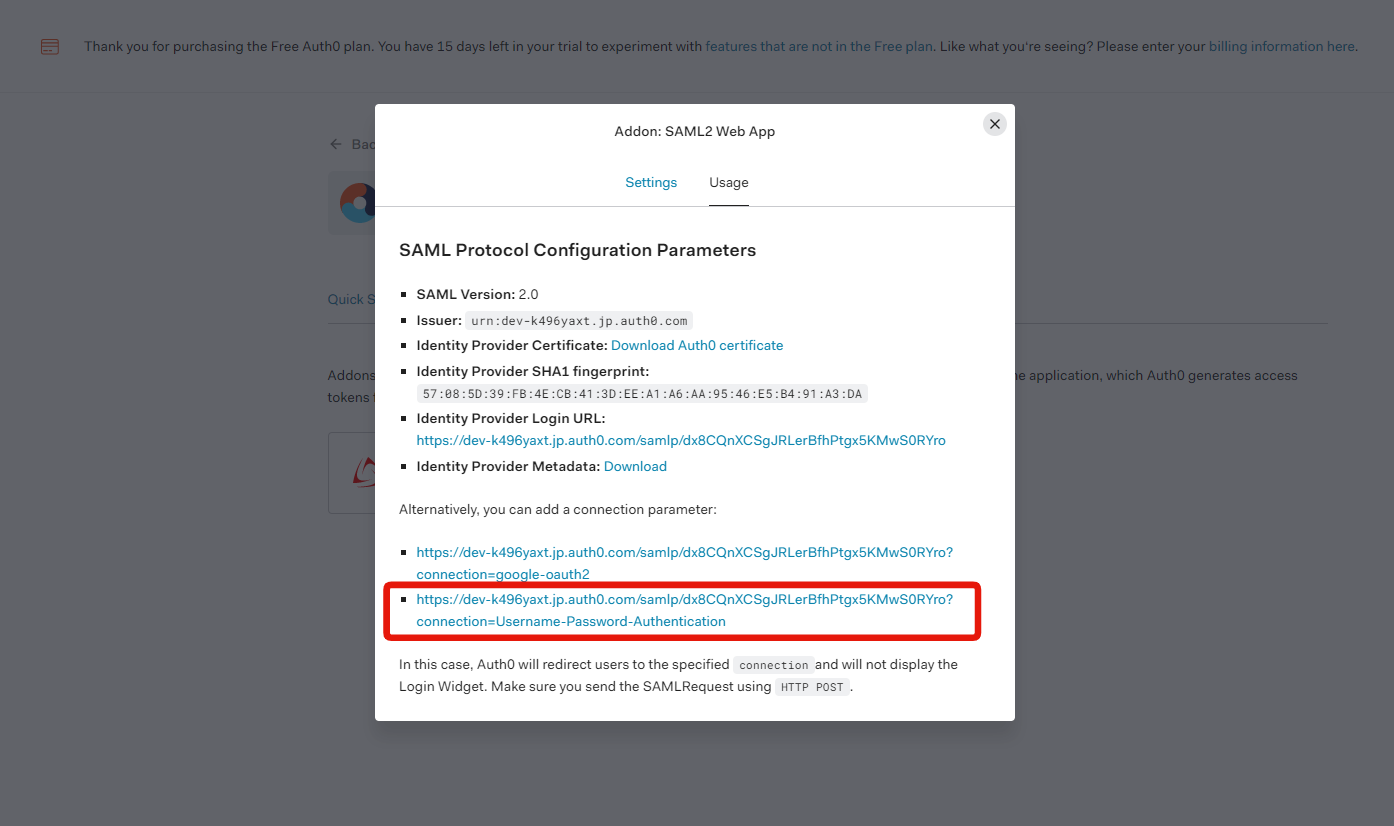
- Enter the registered user account. (If you are already logged into Auth0, this page will not be displayed.)
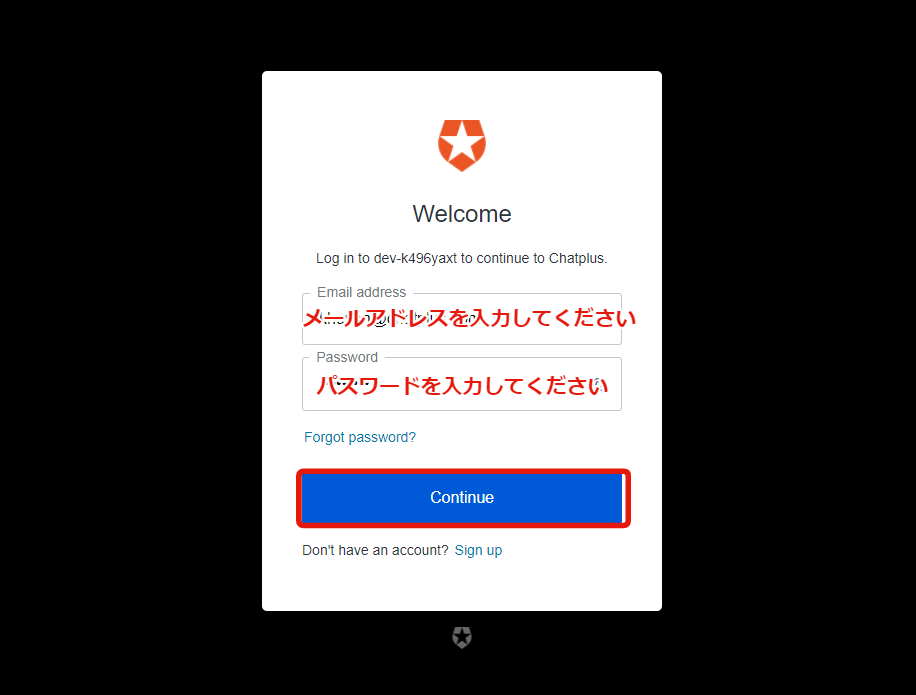
- If you can sign in to Chat Plus, the SSO setting is successful. If it fails, check for errors in the settings and start over.
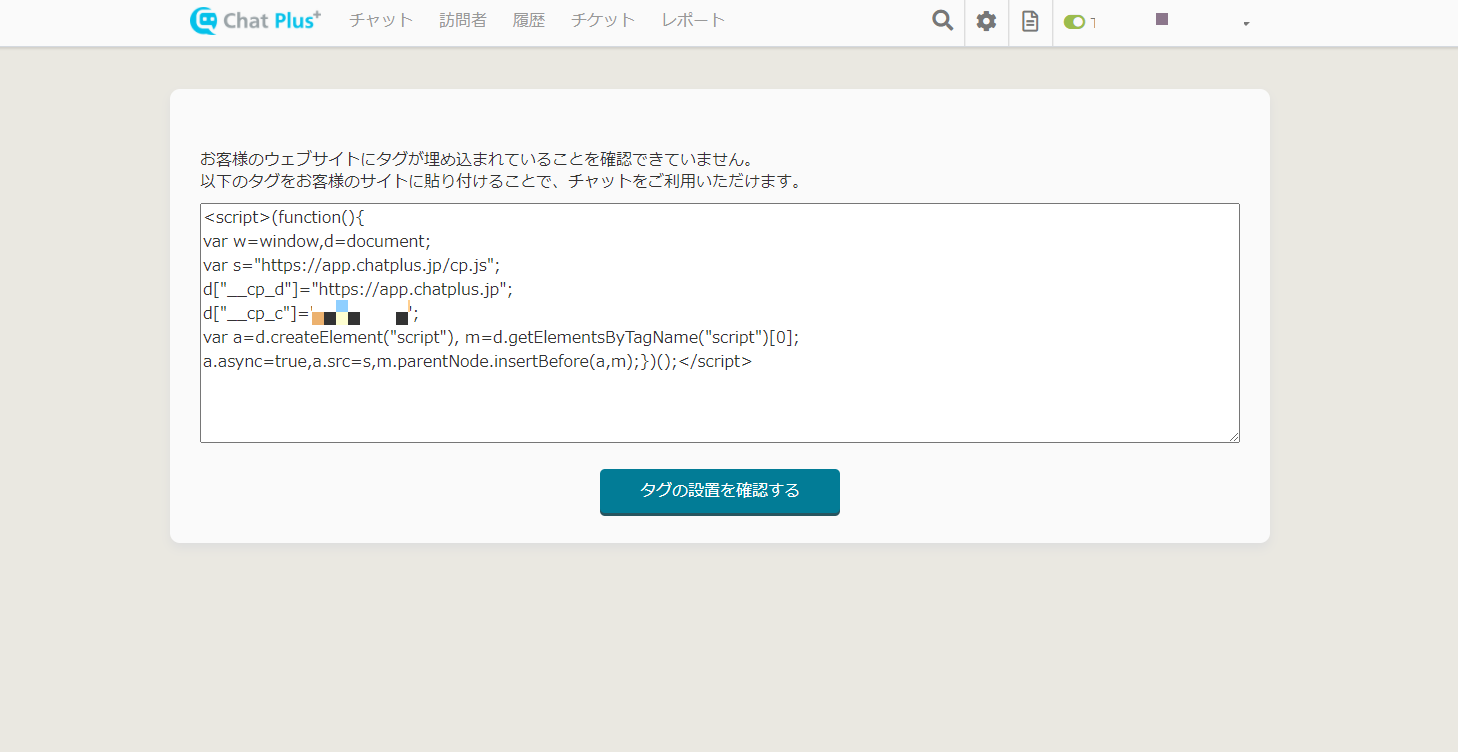
SSO settings and adding users are complete.